

Life of a programmer is hard enough as is. Why not make your life easier and outsource the version control of your projects to some dedicated services? Most programmers in the IT world are familiar with Git, but for some of the OT programmers in this community, this is a brand new concept. When working with different colleagues at the same project sharing code becomes even more of a hassle, a service like GitHub makes it easy to share and work together on the same code. This Blog guides you trough your first steps in using Git and GitHub to keep your code and projects in order.
In this blog I’ll be using GitHub and the GitHub client for windows, but please note there are more options including GitLab. I just like the ease of use of the GitHub Client!
Setting up a repository on GitHub
Step 1 – Download and install the GitHub Client for Windows
Actually, the first step would be to create a GitHub account, but that’s somewhat out of the scope of this blog.
- The Client can be downloaded from here.
- Follow the Installation Guide
- Log In to your GitHub Account
Step 2 – Create a folder or repository for your project
A repository is a place for your project to live. Make one folder for each project! Everytime something changes in this folder the GitHub client will detect it and you’ll be able to save or push your changes to the online repository on GitHub.
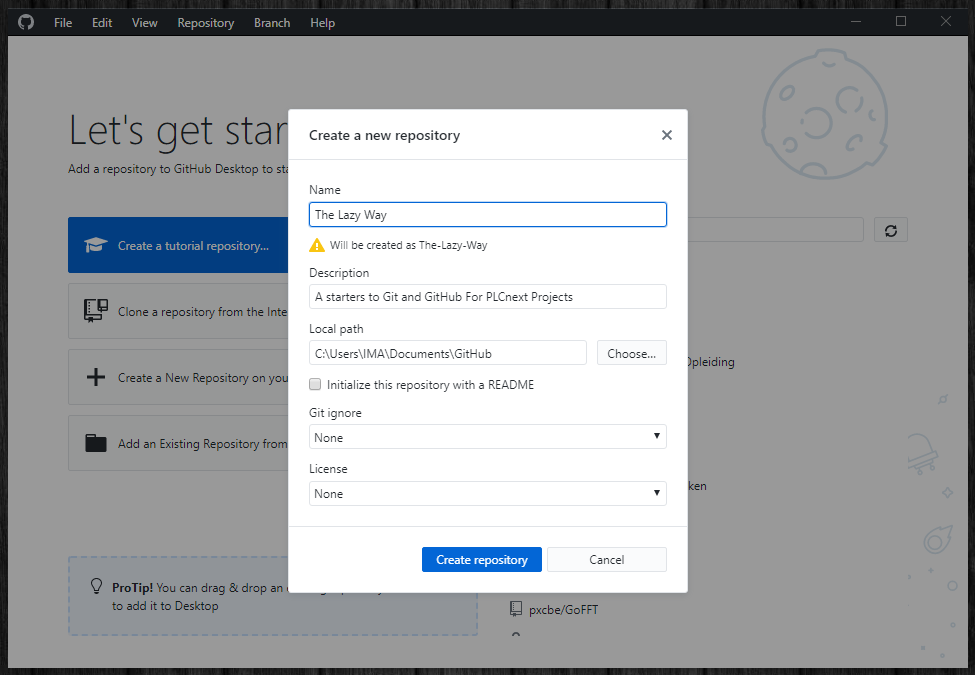
- Click on “Create a New Repository on your hard drive … “
- Give your new repository a name and description.
- You can change the path for the repository if you wish, or leave it be (the lazy way)
- Click Initialize this repository with a README (Lazy doesn’t mean, following best practice and document your code!)
- Create the repository
Step 3 – Create A PLCnext Project
Git works great with text based files. Luckily in PLCnext Engineer there is an option to save your project as a whole lot of text files, perfect for Git and thus for our GitHub client!
- Open PLCnext Engineer and start creating a project as your used to.
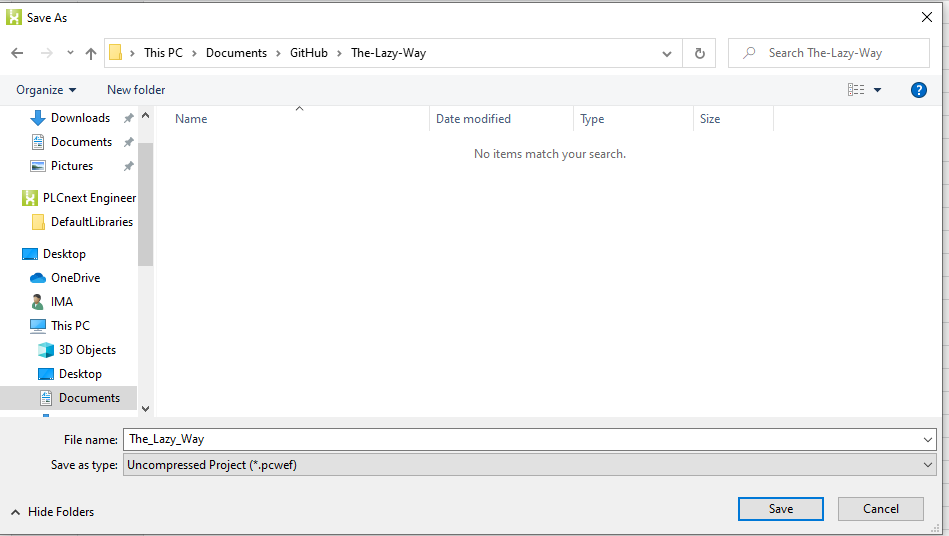
- When ready to save your project, choose Save Project As ( F12)
- Browse to your GitHub repository (default: This PC/documents/GitHub )
- Save your project as an “Uncompressed Project”
Step 4 – Commit your changes
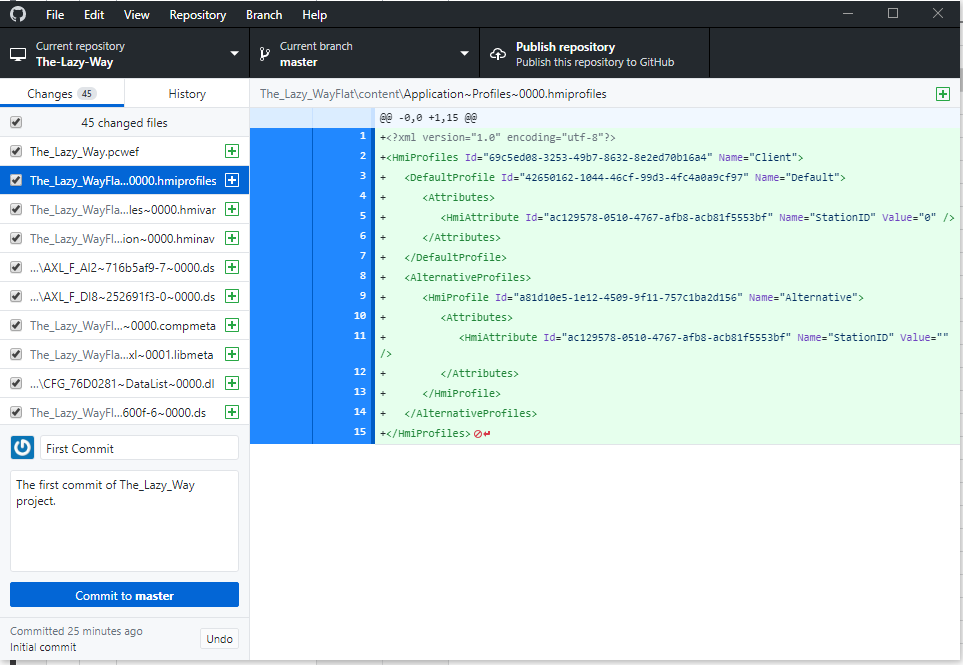
To “save” changes to your repository you need to commit them to a branch. What exactly a branch is, I’ll explain later, for now you just have to remember that you need to commit your changes to a branch in order to save them.
Give your commit a new and a short description so you can remember what changed exactly!
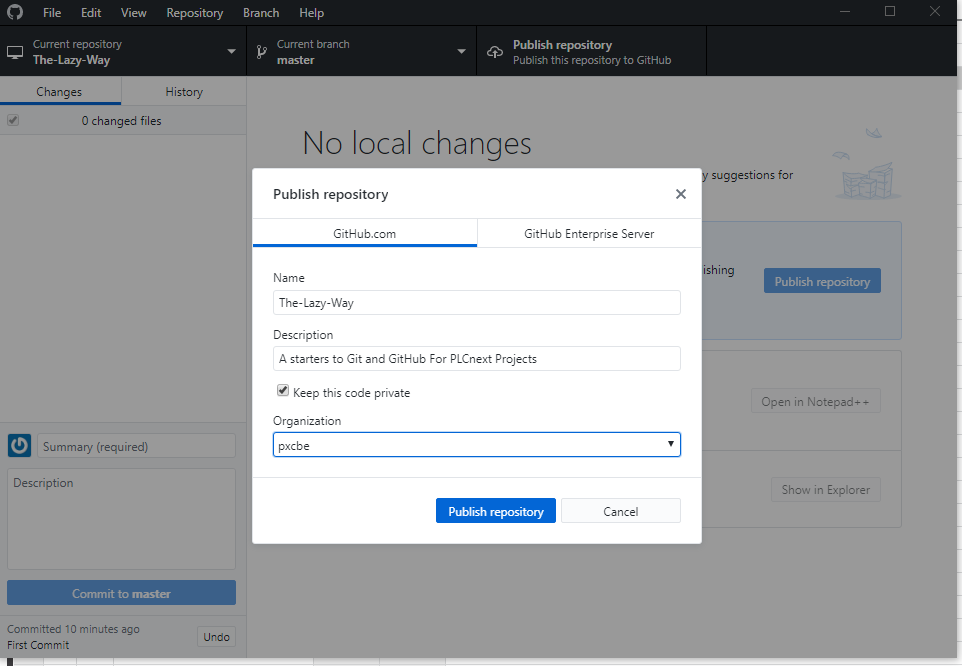
Step 5 – Publish or Push your repository
The final step to create a repository online is to push our local repository to GitHub. This as easy as pushing a button or pressing (ctrl + p ). Choose if your code should be private and if it belongs to you, or an organisation.
Step 6 – Document!
press ( Ctrl + shift + G) to view the repository online on GitHub in your browser. Voila! There is you PLCnext Project on GitHub. Remember the “Initialize README”? That’s the text you’re seeing now in front of you. In the README.md you should explain the structure of the project, the purpose and maybe some contact information for future reference.
For now make some changes, to the README.md file by clicking on the pencil. The file is “Written” in MarkDown more information about MarkDown can be found here.
If you’ve made some changes, again commit to the master branch!
Step 7 – Pull changes to your local repository
The Windows Client will detect that some changes where made to the Repository on GitHub. Don’t forget to pull the changes to start working on the latest version again!
Tips & Tricks
Issue Tracker
GitHub has a wonderful issue tracker, use it to track known issues in your software and discuss solutions with the other stakeholders
Projects
Use the build-in Project Bord to keep track of your task with an kanban bord. If you feel like it you can automate your kanban with built in triggers to make life even easier.
Branches
Aah, here we are. See, I said I was going to explain what branches are! Well, I’ll let GitHub explain what branches are …
Use a branch to isolate development work without affecting other branches in the repository. Each repository has one default branch, and can have multiple other branches. You can merge a branch into another branch using a pull request.
Going to make a lot of changes or implement a new feature? Create a branch to keep your changes isolated and merge your “feature branch” into your master branch with a pull request.
Release
Ready to deploy a project? Create a release to add to your AS Build!
Leave a Reply
You must be logged in to post a comment.