The PLCnext controllers supports multiple ways of connecting to a cloud service. You could use IEC Function blocks from the IOT library, build your own .NET application, write a python script or compile a connector in GoLang. If you want to write code, you have a lot of options. But what if, for some reason you don’t want to write code? Maybe it’s your first project, or maybe it’s been a while? In this blog I’ll show how to build a IOT Web application, without writing a single line of code!
Ok, when I said we wouldn’t be writing a single line of code, it was maybe a bit of a stretch. Of course we’ll need some way of telling our PLCnext Controller and cloud service what we want. For this we’ll only use graphical interfaces, so I guess I’m technical correct when I say we’ll not write a single line of code? Anyway, the approach is considered “low code”.
Firts, let me introduce the different elements or services we will use in this blog.
Introduction
PLCnext controller, I guess this one doesn’t need much further introduction. If you are still unsure about it capabilities be sure to visit the PLCnext Infocenter.
Node-RED, The official Node-RED website describes Node-RED as:
Node-RED is a programming tool for wiring together hardware devices, APIs and online services in new and interesting ways.
It provides a browser-based editor that makes it easy to wire together flows using the wide range of nodes in the palette that can be deployed to its runtime in a single-click.
In previous written makersblogs, Node-RED gets mentioned quite a few times. Unsure how to start using Node-RED? I suggest reading this article.
Azure IoT Central, is a SAAS (Software As A Service) solution in the Azure cloud to build codeless IoT solutions. We’ll create a device template with a defined interface and the visualization will be derived from the created template.
In this template we can define three “kinds of variables”. Telemetry, properties and commands. I’ll use the different sorts in the template, I hope the distinction between properties and telemetry will be clear after using them. If it’s still a bit fuzzy, be sure to read about them in the articles linked in the further readings section.
For the sake of simplicity, we are going to limit our example to a very basic pump controller. We can set the pump in a different mode and give a setpoint to the pump.
Building the application
Preparing the controller
Start with updating your controller to the last available firmware and install the balena-engine for OCI containers. You can find the instructions for installing Balena here. When the Balena Engine was installed successfully run the next command (this will take a while).
balena-engine run -it -p 1880:1880 --name nodered --restart always pxcbe/node-red:azureiot
Create the Azure IoT Central service
Log in to your Azure account and create a resource group. In this resource group you can now create a new Azure IoT Central applications. Be sure to check out the different Tiers before choosing one.
Go to your newly created Azure IoT central service and if all goes well, you should get prompted to create a new device template. Choose to create a new custom template as IoT device. Execute the following steps to create the correct template for this exercise.
Creating the device template
- Assign the name “pump” to the Device template
- Create a Custom model
- press “add capability”
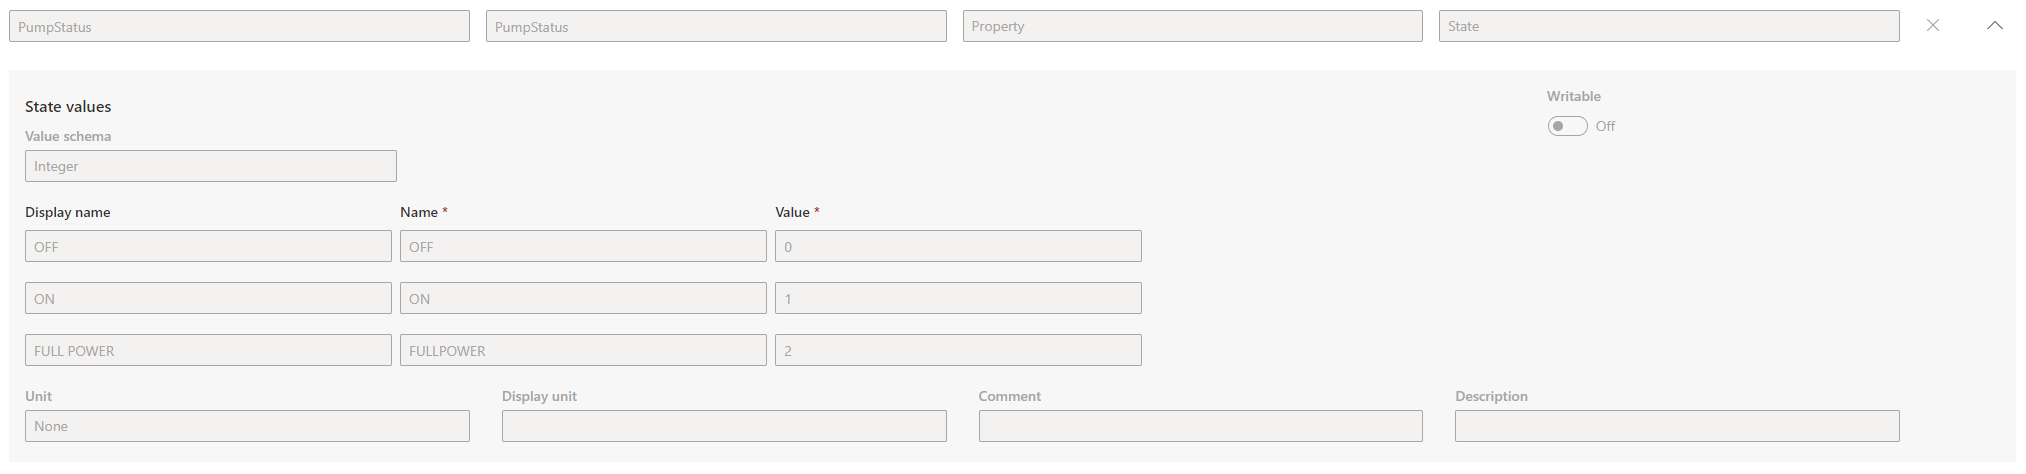
- Create a property “Pump status”
- Create a Telemetry “Flow Rate”
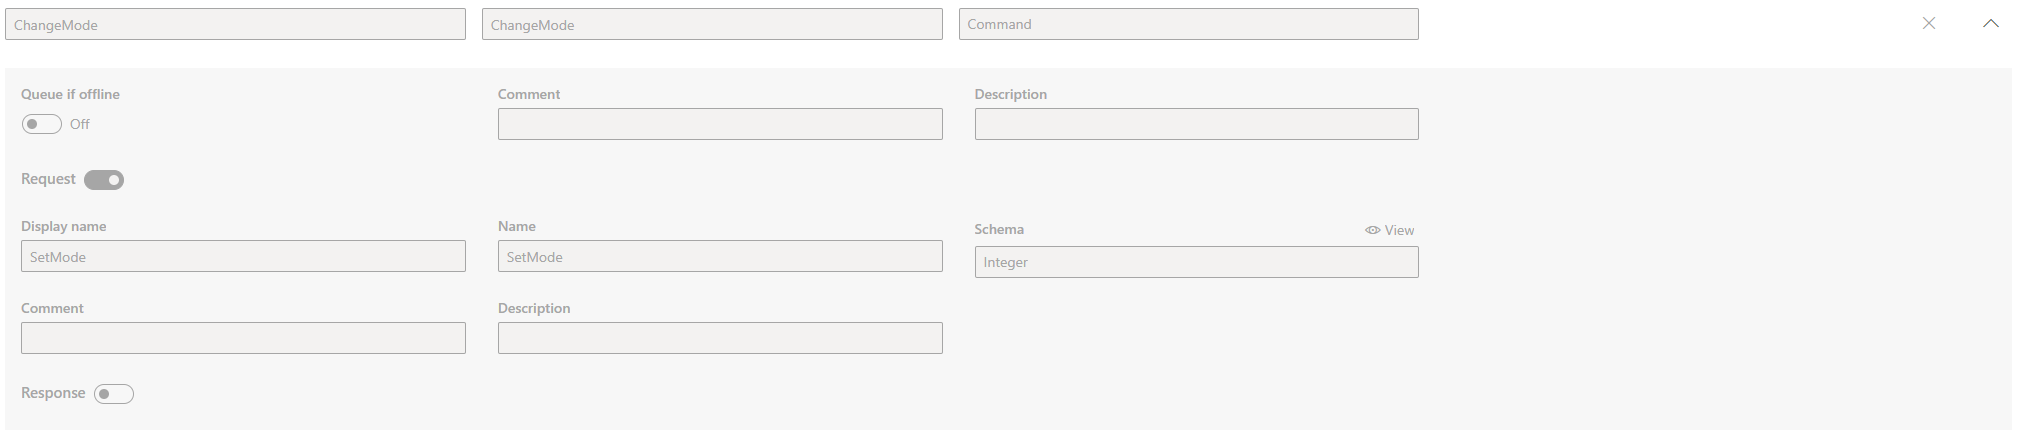
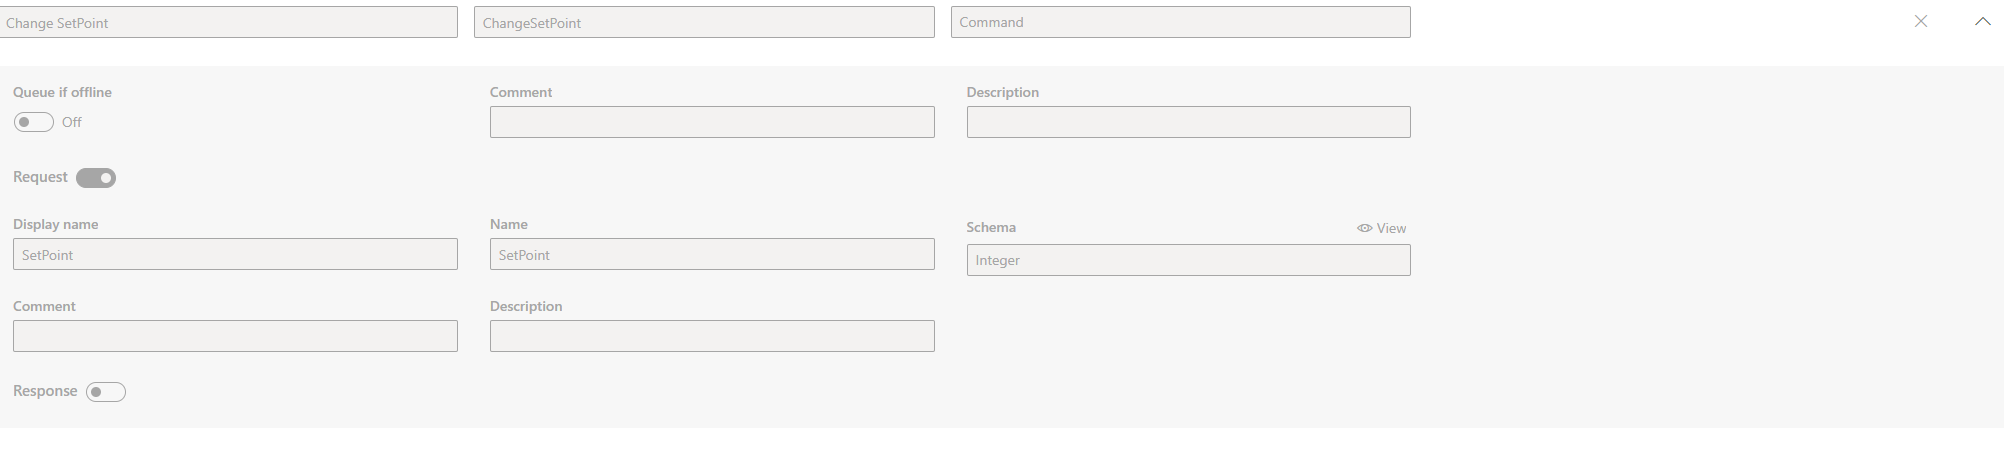
- Create a command “Change Mode”
- Create a command “Set Power”
- Save the newly created capabilities
- Go to views and select, generate default views (You can change the views later)
- Publish your device template.

(Having troubles? Feel free to import the template from the repository )
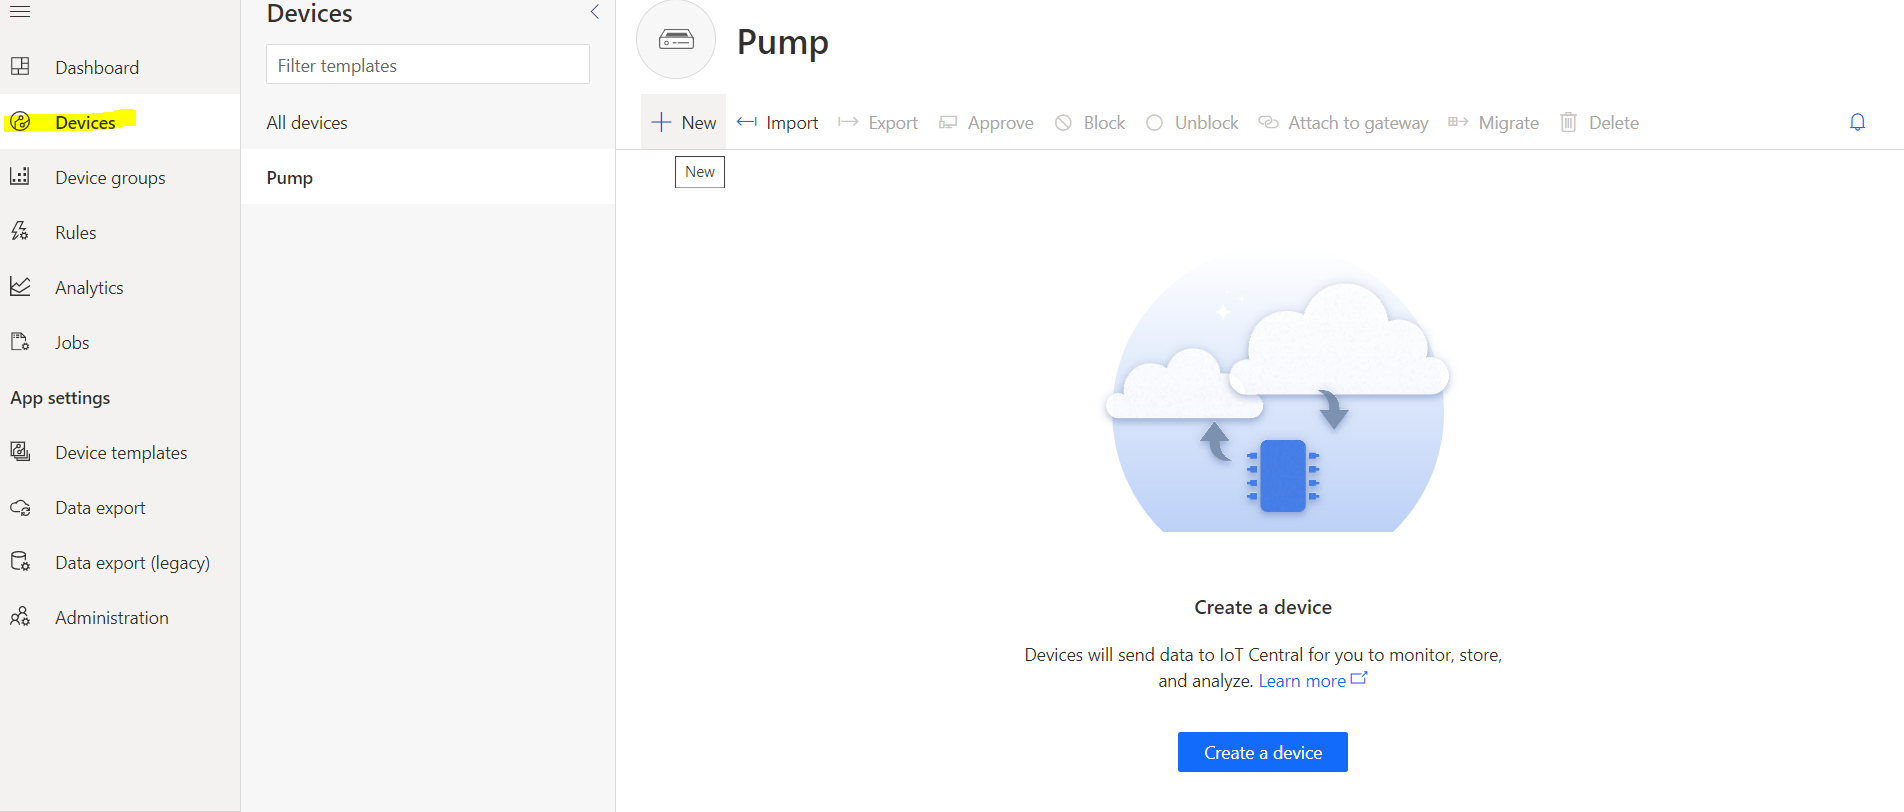
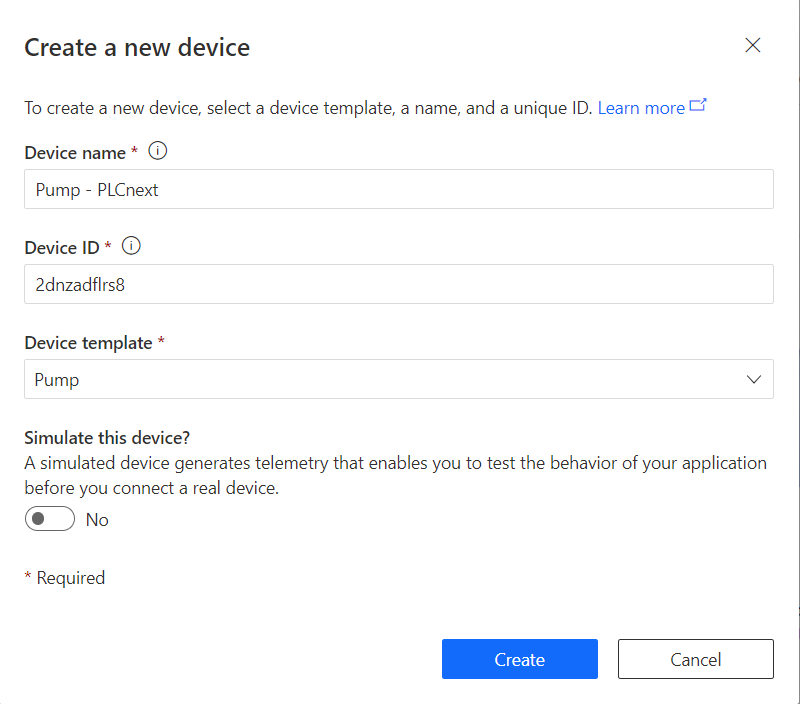
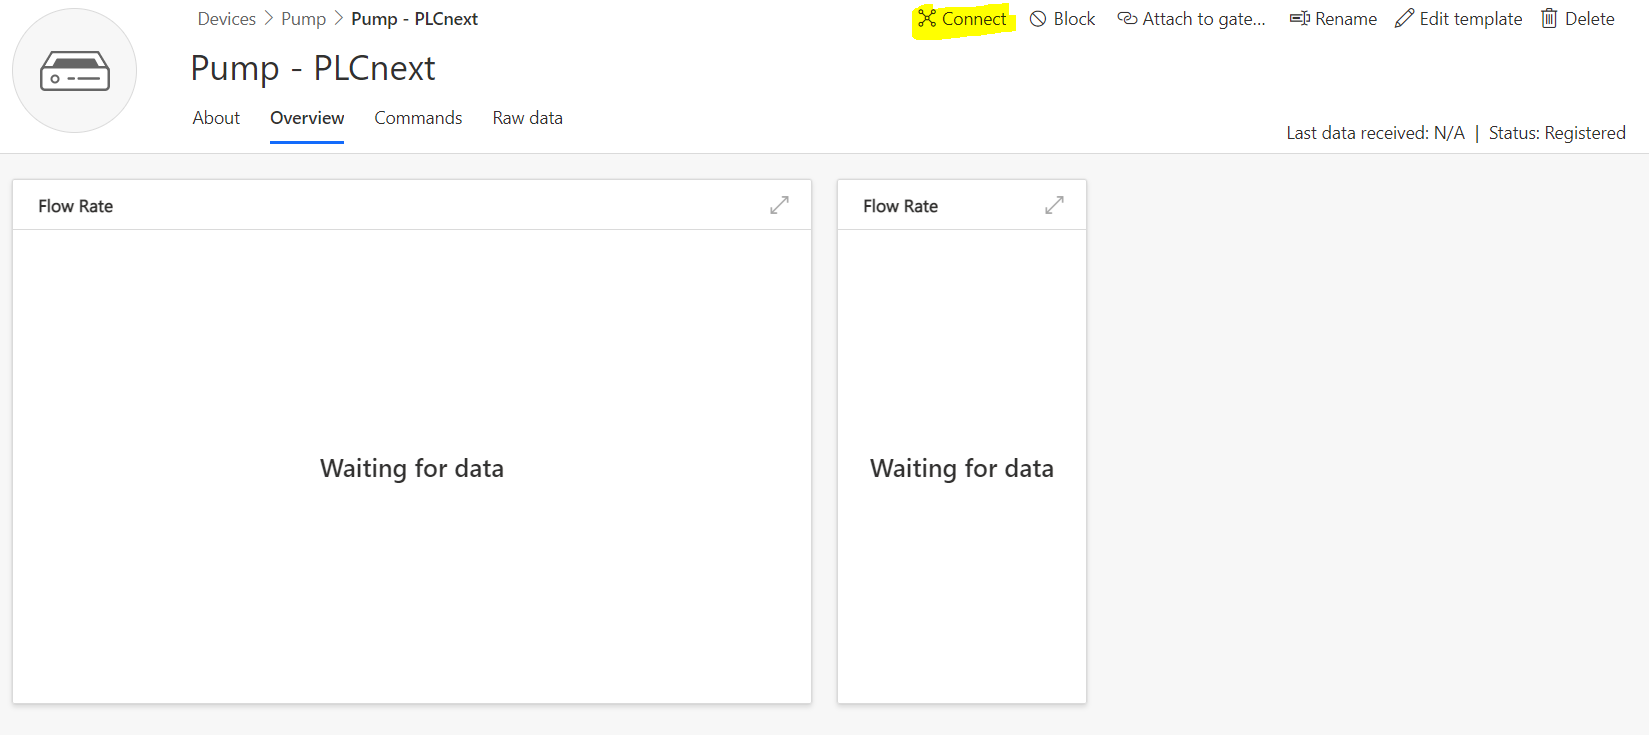
Create a New device
Create a device, based on the newly created template. Click on “connect” and take note of the “ID scope”, “Device ID” and “Primary key” for later use in node-RED.
PLCnext Engineer
We’ll need some logic to control our pump. I’ve provided a PLCnext Engineer project in the repository that you can use. Feel free to add on this project to give our pump some new features!
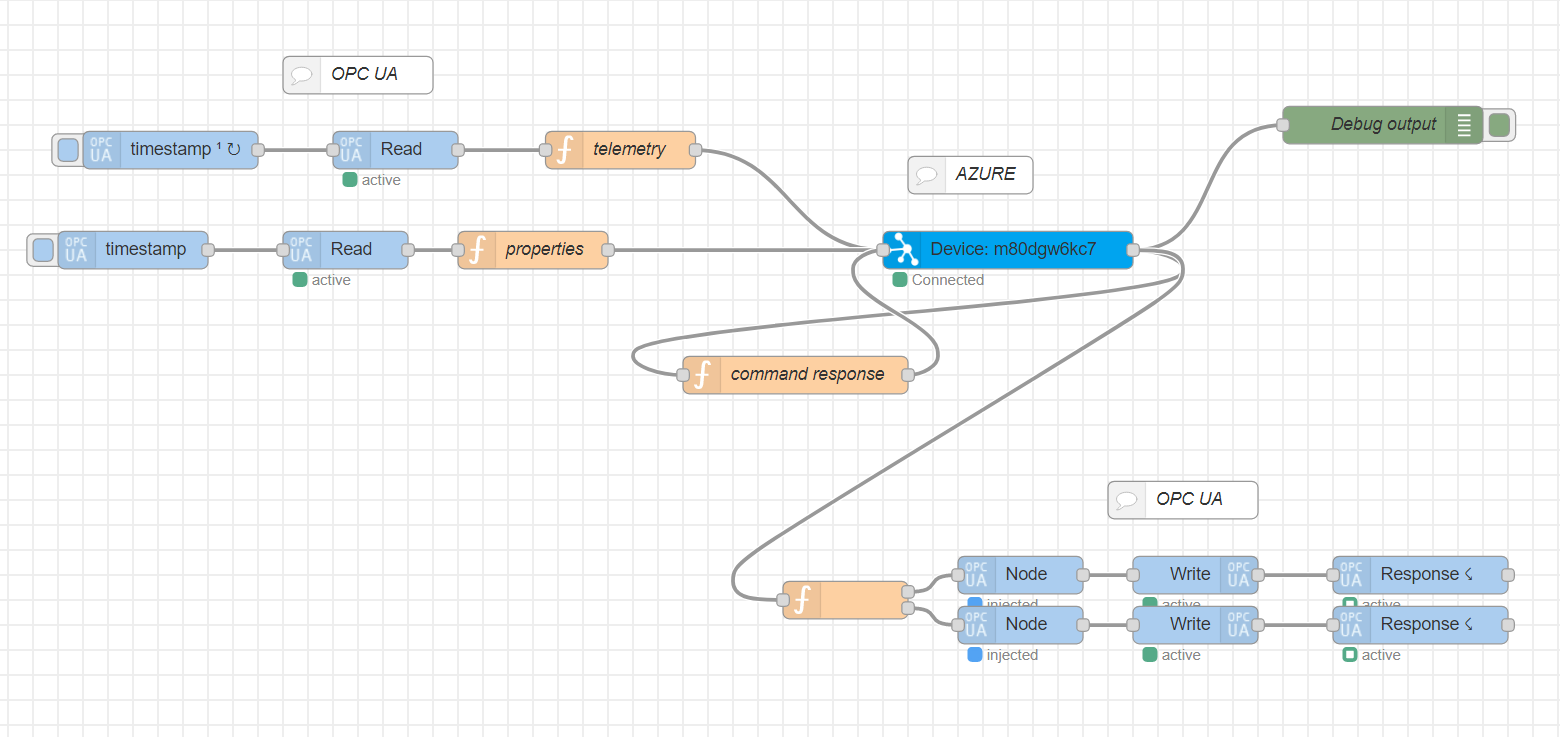
Node-RED
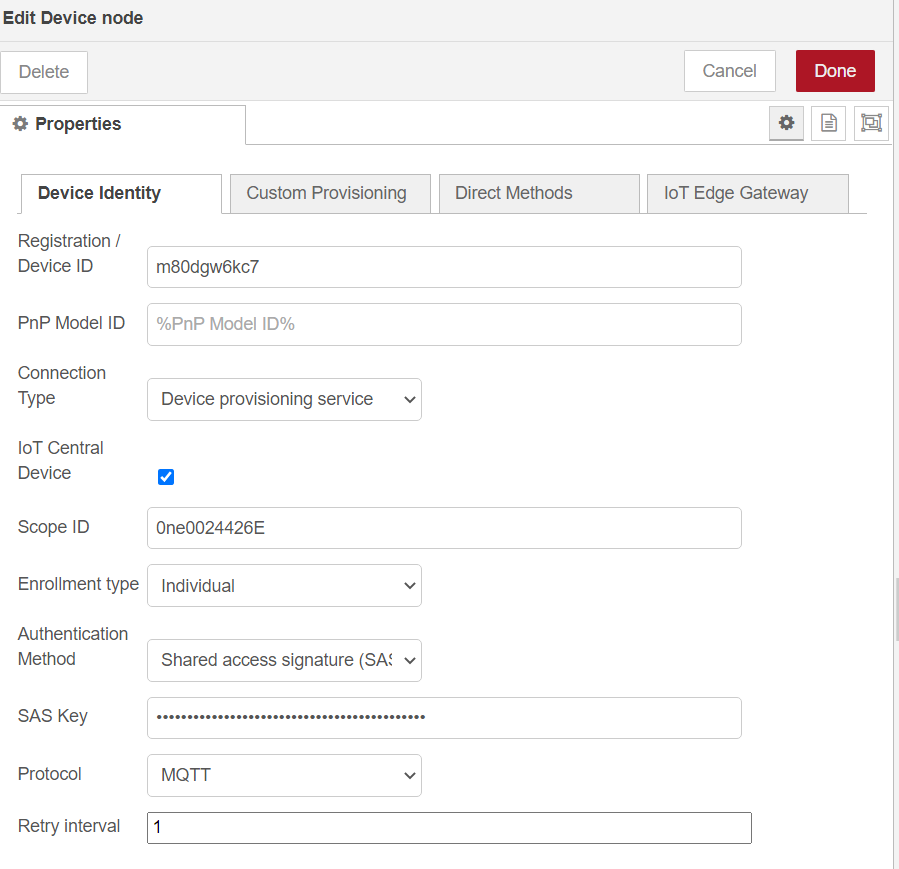
In the meantime your container was created and your node-RED environment should be up and running. Import the flow.json from the repository. Click on the “Device” node and set your “Device ID”, “Scope ID” and choose “Device Provisioning service” and copy past your primary key.
Set your OPC UA server by clicking on the READ or WRITE nodes and change the settings to fit your controller, and finish the application by deploying the nodes.
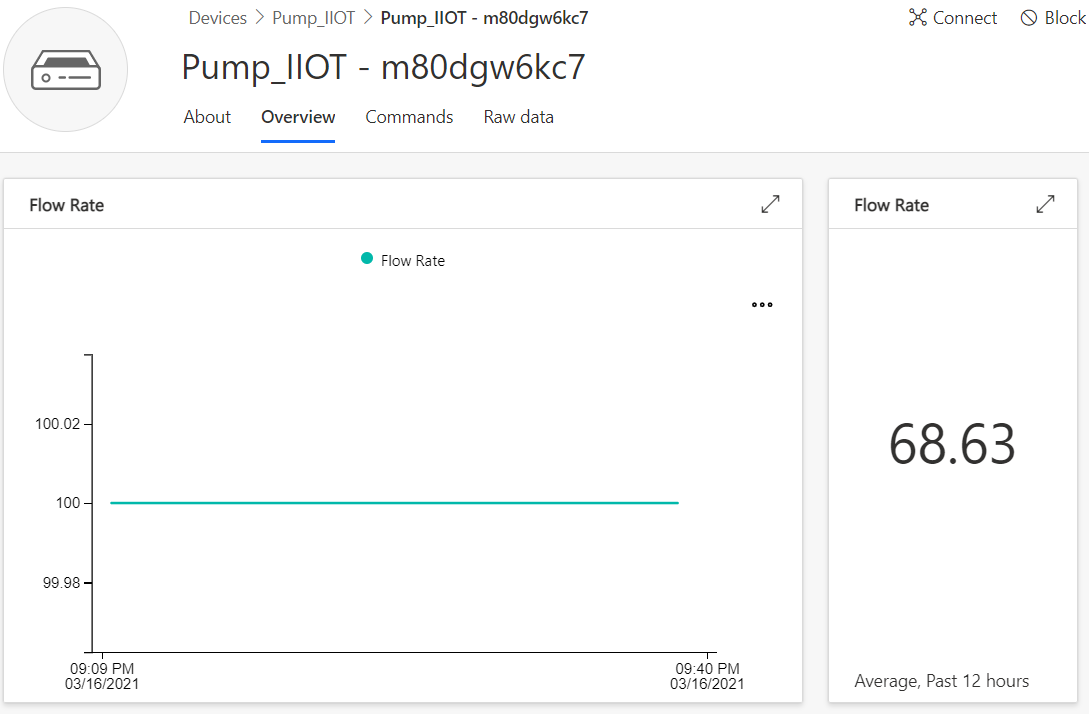
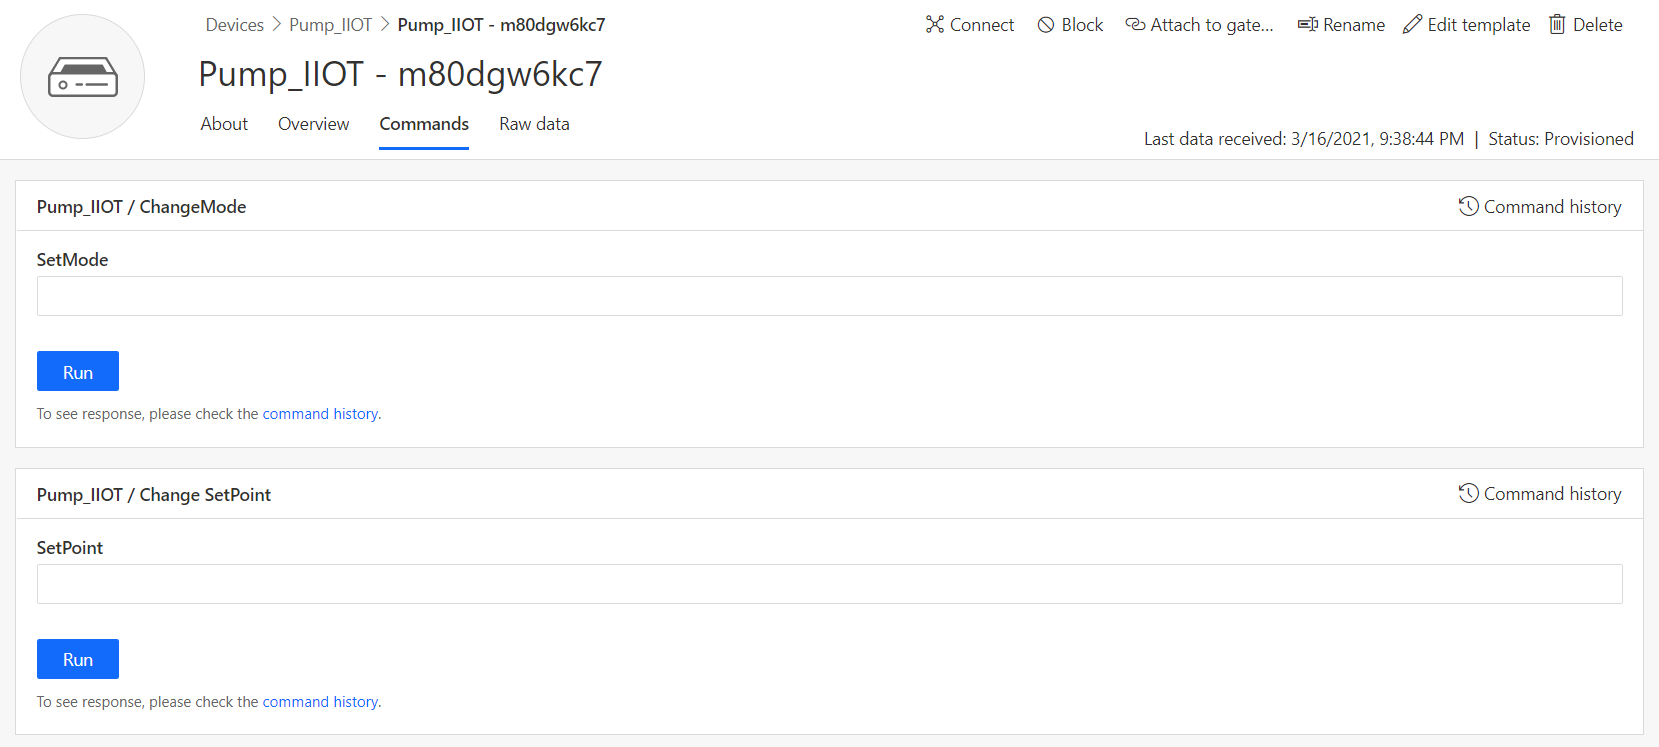
Testing the Application
We are ready to test the application. You should be able to control the pump by changing it’s status and setting a new setpoint. The application was deliberately left as basic as possible, I encourage you to build form here to get a good grasp of all the different settings you can make when setting your interface. You can even create a map to show where your pumps are!
Leave a Reply
You must be logged in to post a comment.