

Introduction
Hello everyone, I’m going to talk about the straton runtime and its programming environment around the IEC61850 standard. This runtime respects the standard Editition 2, a protocol which is in full evolution in the energy field.
In the past, Phoenix Contact has developed an IEC61850 stack for PCWORX and our former PLC range (AXC1050), today thanks to this application available on the store, it is possible to combine PLCNextEngineer and the IEC61850 standard. Moreover, this runtime offers the huge advantage of configuring a 61850 client, so the possibility to send commands. Something that didn’t exist in the past, allowing to open other doors to the energy market.
I wanted to share what I was able to do. I plan to create several Makers Blogs about this standard.
The first tutorial is about downloading the application, installing it, creating a license and exchanging data between the two environments.
The second tutorial will talk about MMS communication (server-client), creating an SCL configuration on a server and mapping between IEC61131 and IEC61850 variables. (https://www.plcnext-community.net/en/hn-makers-blog/659-straton-tutorial-2-mms-communication.html)
The third tutorial will cover the creation of a GOOSE communication (server-server).
And the last one in the series will show how to pass commands from a 61850 client to a 61850 server.
Tutorial 1 – Data Exchange between PLCNextEngineer and straton
1) Installing and licensing
- As a first step, it is necessary to download the application for the AXC F 2152, available on our store.
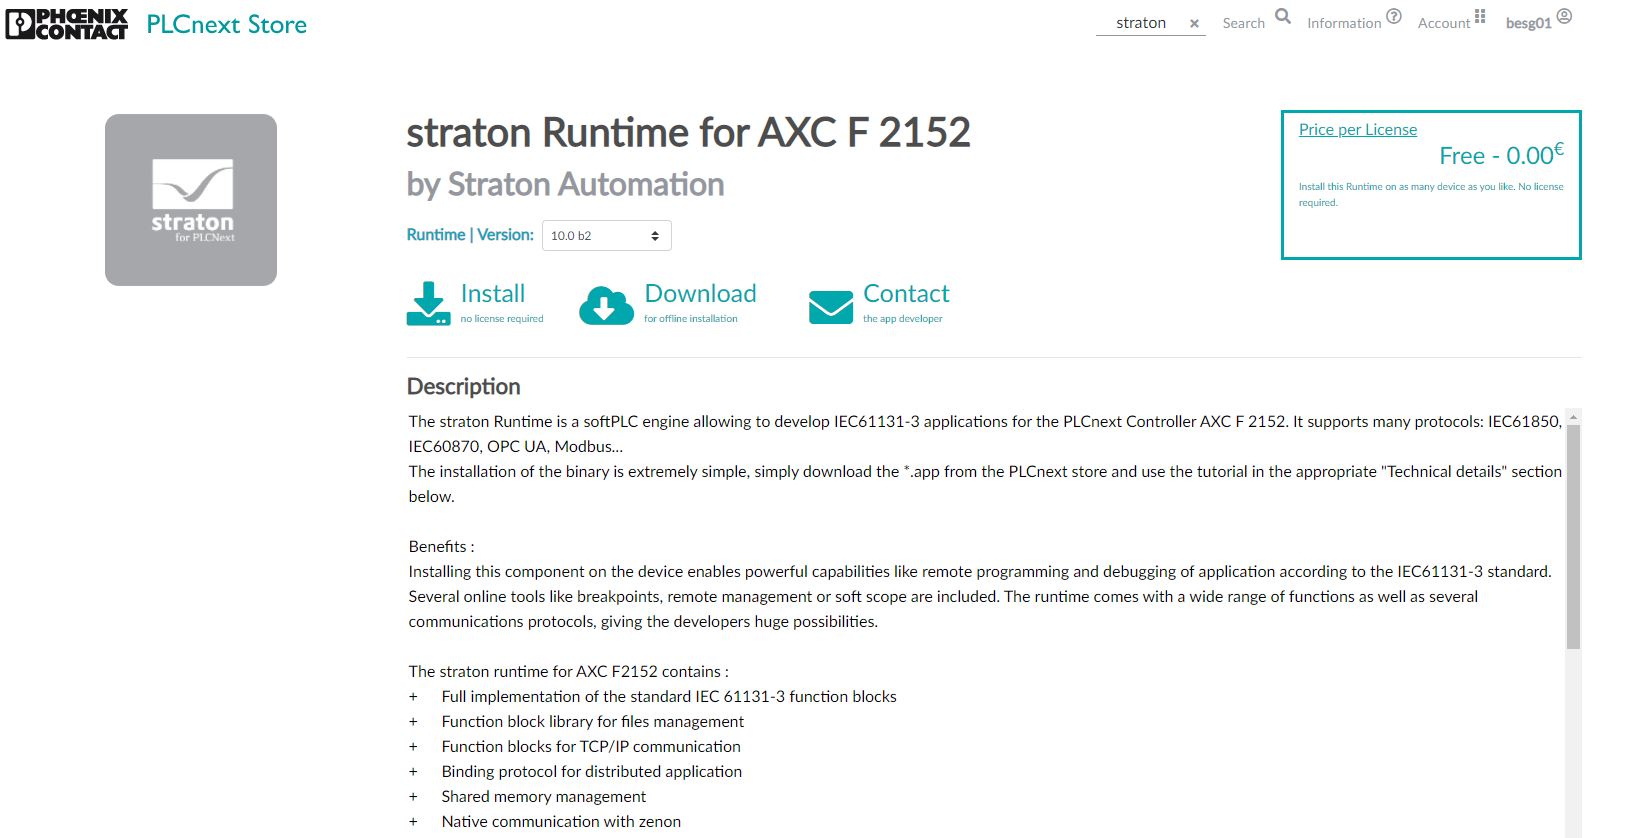
- Then, as for the other applications of the store, it is possible to install it via the web-based management.

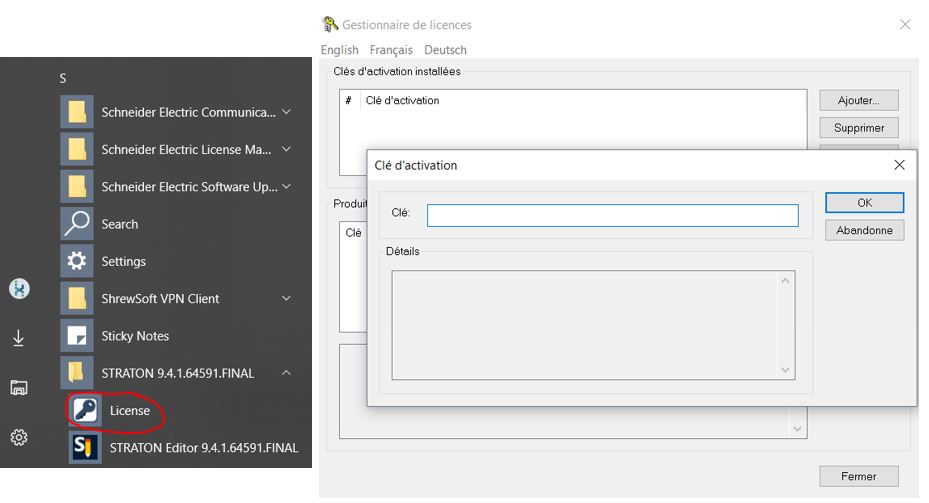
- After starting the AXC F 2152, the stack 61850 is valid for two hours. Without a licence, it will have to be restarted to continue development. The best way to work is to contact straton directly (sales@straton-plc.com) , stating your needs and the number of datapoints you wish to use. Depending on your needs and the number of licenses ordered, they will be able to offer you tailor-made prices.
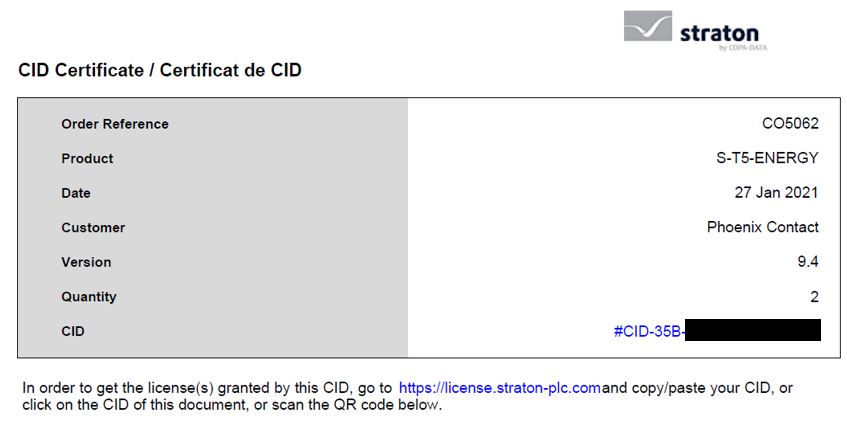
- Follow the link https://license.straton-plc.com/ in order get the license granted by this CID.
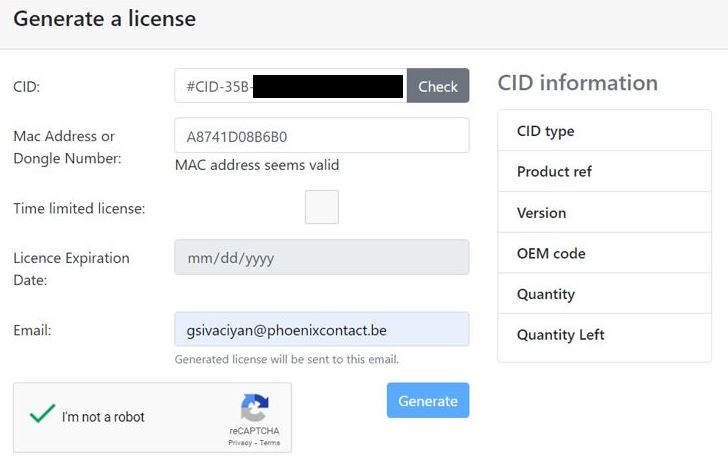
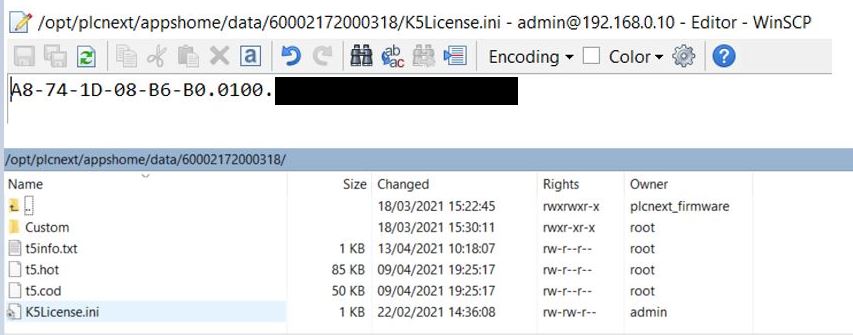
- Then you need to connect to SFTP and create a file in the PLC appshome/data/60002172000318 directory called K5License.ini and copy-paste the result of the e-mail generation.
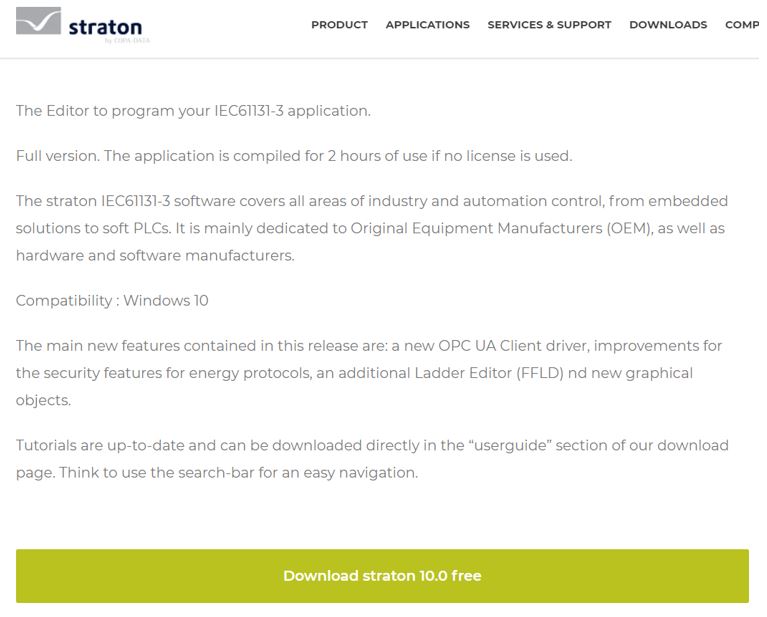
- Now you have installed the runtime on the PLC, you can download straton Editor (the programming environment) by logging in with your credentials on the straton website https://straton-plc.com/en/. Of course, depending on your needs you can request a license for straton Editor (not necessary for the needs developed in this tutorial series).
2) Exchange of data between PLCNext Engineer and straton
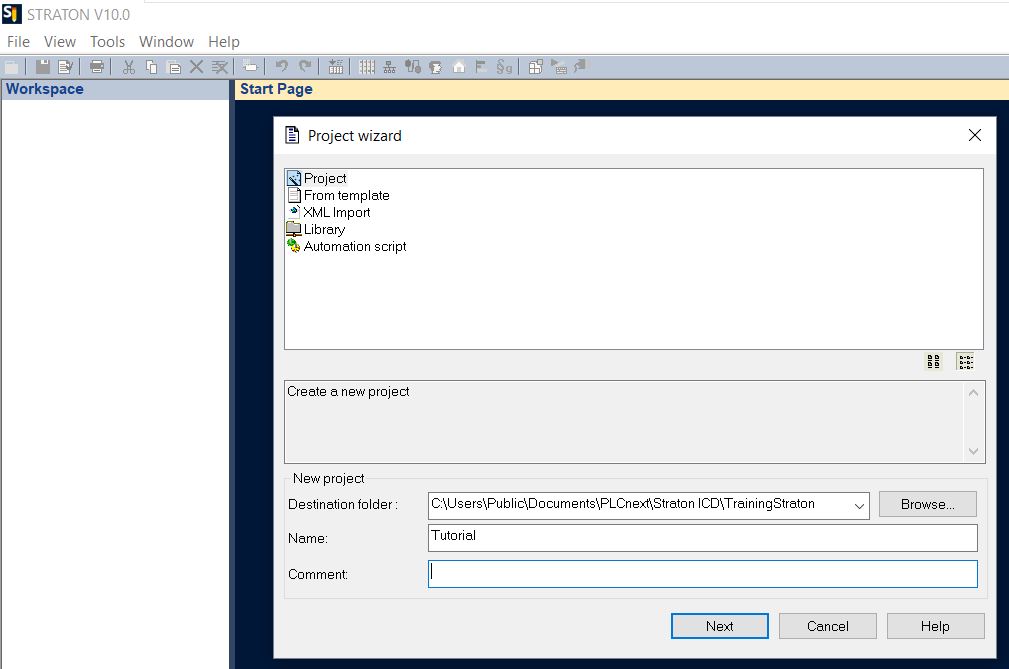
- Open straton Editor and create a new project. Go to “File” then “Add New Project”
- Choose your programming language (Structured Text recommended) and the IP of the controller.
Don’t change the port 1100, it’s the straton runtime default communication port for the Ethernet cards of each device.
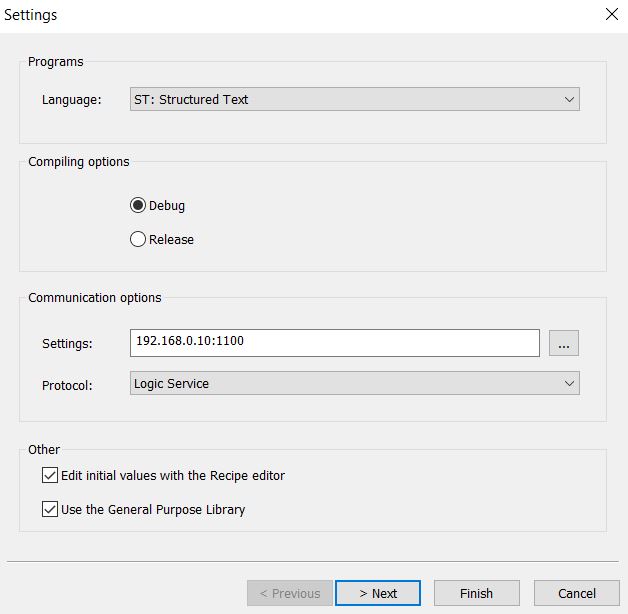
- Then choose the protocol you will use (For the moment I only choose MODBUS Master for communication between environments). It’s always possible to add protocols you want later.

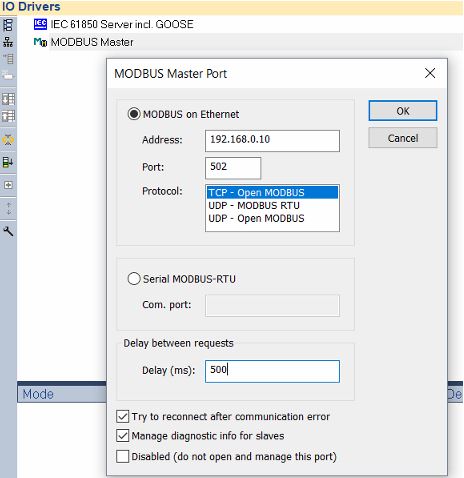
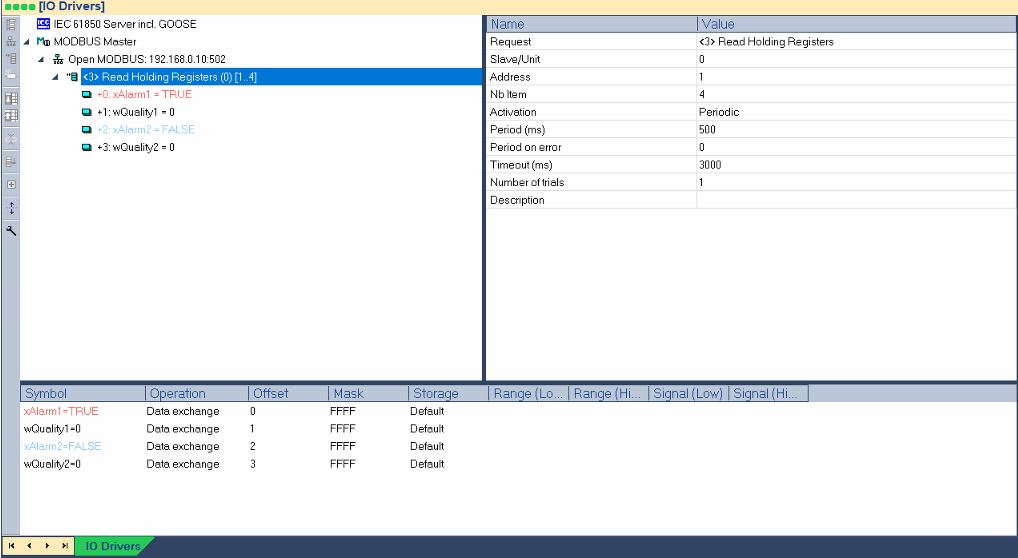
- First, in the “Fieldbus Configurations” tab you have to select the Modbus Master driver.

- Under the Modbus Master, insert a Modbus Master Port and configure its network parameters.
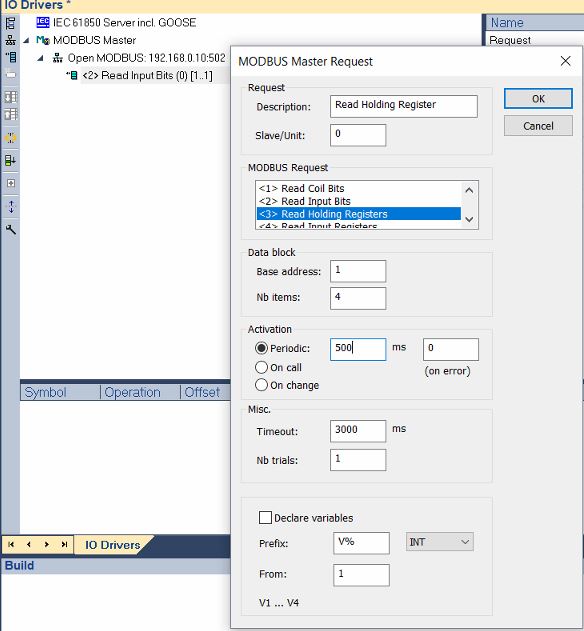
- Under the Modbus Master Port, insert a Modbus Master Request and select the FC and the datacount (determine the number of the variables = Nb items) you want.
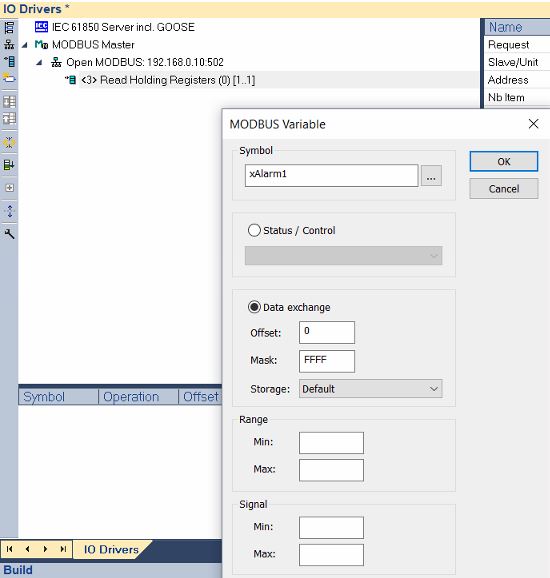
- Under the Modbus Master Request, insert the Modbus variables you want without forgetting to set the offset (different for each variables), in other words the place of the variable in the register.

- Now that the configuration is ready on straton, you need to set up a TCP/IP MODBUS server on PLCNEXTEngineer and go online in order to establish the communication between both environments.
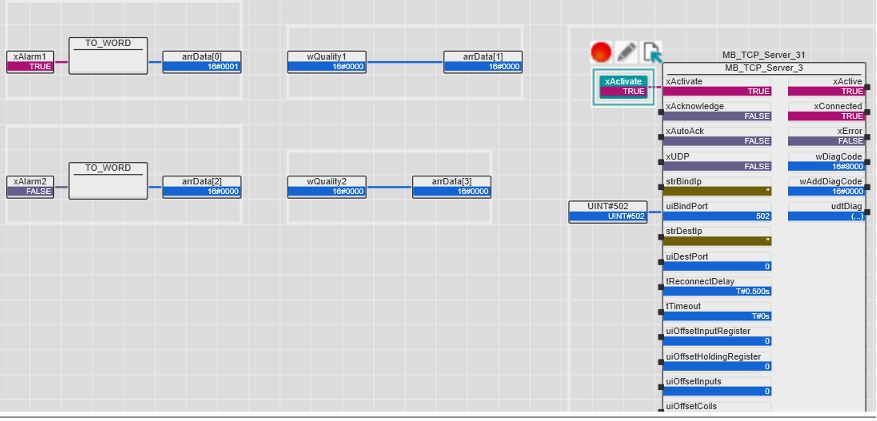
- Build the project on straton and go online too. Now you can toggle the variable in PLCnextEngineer and see the effect on straton.

If you have more question I suggest you to contact the App developer here :https://www.plcnextstore.com/message?appid=1084&messagetype=aq
Or directly the straton support here support@straton-plc.com
Thanks for reading !
Leave a Reply
You must be logged in to post a comment.