How to integrate an external information model
This guide is based on the Process Automation Device Information Model (PA-DIM), a companion standard used in the process industry. For other information models the procedure would be similar.
-
Get the documents
We'll need the companion specification and the NodeSet.xml file.
- The companion specification can be found on the OPC Foundation website. It contains a link to the NodeSet file, which is also available on the OPC website.
- For PA-DIM, an additional NodeSet.xml file with IRDI references is required. It can be found here on the OPC website.
-
Add the NodeSets to the eUA server
- Copy the NodeSet.xml files into the /opt/plcnext/projects/Default/Services/OpcUA/NodeSets/ folder of the controller.
- The new type nodes will be available in the address space after downloading a new project, or restart of the PLC (where also the OPC server restarts). This can be seen in the namespace list of UaExpert.
Note: There is no defined order in which the NodeSet files are loaded and therefore also no defined order of the namespace indices.
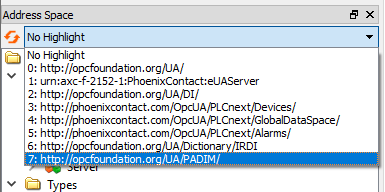
- Also the new types can be found in the address space, highlighted here in bold:
If there are issues loading the NodeSets, they are shown in the Notification Log in PLCnext Engineer. More detailed information for developers can be found in the log file.
-
Create an instance NodeSet.xml file
In this example, UaModeler from Unified Automation GmbH is used to create the new NodeSet manually. This is appropriate for very small projects, or to find out how the resulting NodeSet should look like. For most projects this XML file should be generated by some tool or script.
After adding the NodeSet.xml files of DI, PADIM and IRDI, the project looks like this: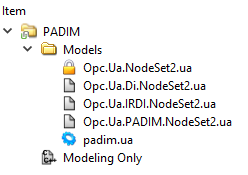
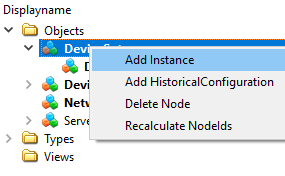
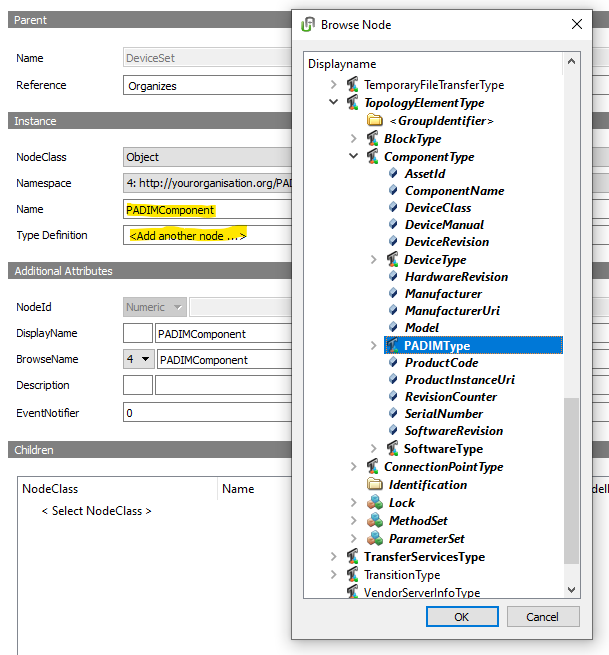
Now the first instance node can be created:
- Add a node named
PADIMComponentof typePADIMTypeto theDeviceSet:
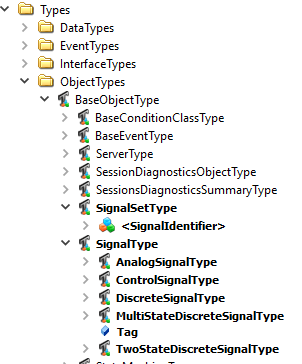
- Then, add some optional nodes from the base type that are required in later steps.
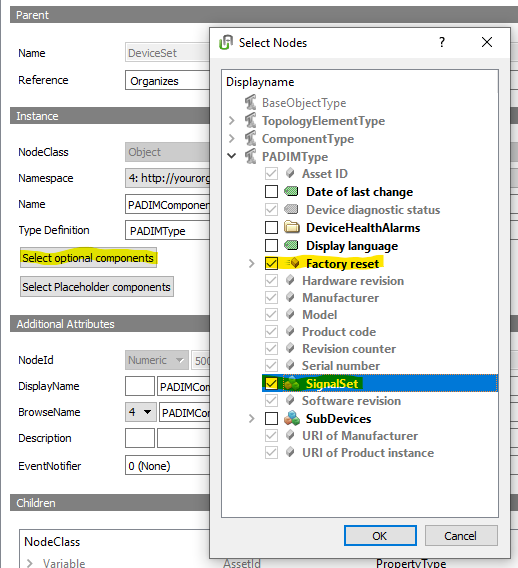
As a result, the address space looks like this:
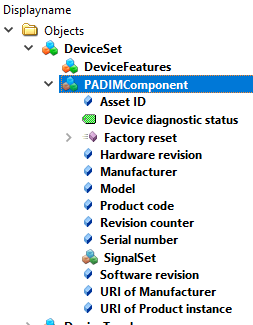
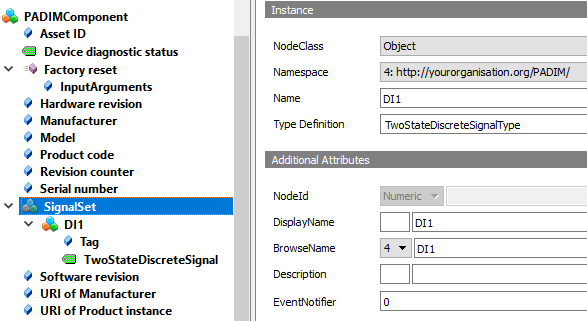
- The optional
SignalSetnode is the container for the signal objects. Now add another object namedDI1of the object typeTwoStateDiscreteSignalTypeto theSignalSetobject:
- Now test the new instance NodeSet file. Generate a NodeSet file for the new PA-DIM instance model:
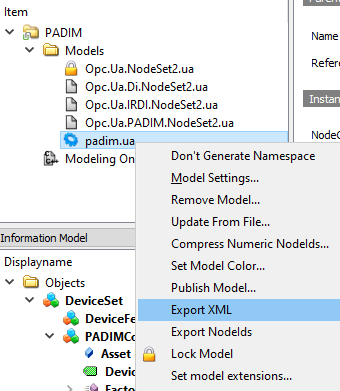
As a result, there is a new padim.xml instance NodeSet file besides the UaModeler project. - Copy the padim.xml instance NodeSet file to the controller into the NodeSet folder.
- To make the UA server reload the NodeSet files, either restart the PLC, or download some changes to the project.
After restarting, the UaExpert shows an address space like this:
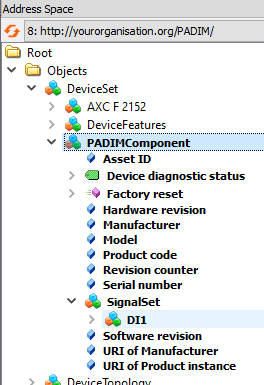
Note: The client needs to rebrowse the address space in order to reveal the changes.
In the picture above, UaExpert is configured to highlight the namespacehttp://yourorganization.org/PADIM/. Therefore the new instance nodes are shown in bold.
The new nodes are just static information. The next step is to get real data from PLC variables.
- Add a node named
-
Create a UA variable and get the value from a PLC variable
In this step, we want to keep the node of the PA-DIM model but take the value from a PLC variable that we introduce for this purpose.
- To do this, extend the PLC project with a new boolean variable for the
DI1PA-DIM signal. - Then determine the instance path of the variable. An easy way to do this is to look up the
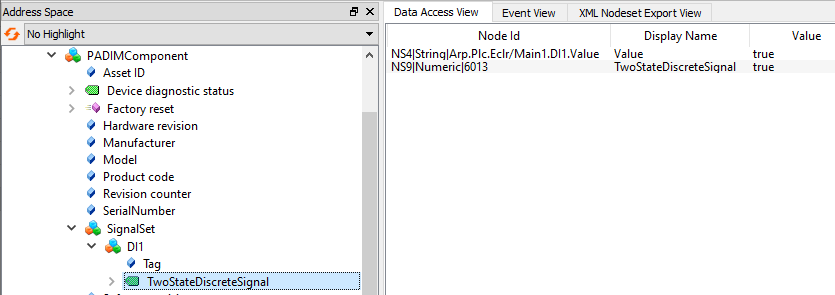
NodeIdof the new variable in UaExpert: Download the changed PLC project and check theNodeIdwith UaExpert. Depending on the name and location of the variable theNodeIdcould look like this:"ns=4;s=Arp.Plc.Eclr/Main1.DI1.Value"The instance path is the identifier of thisNodeId("Arp.Plc.Eclr/Main1.DI1.Value"). - Now edit the NodeSet file again. Search for the variable with the
BrowseName"3:TwoStateDiscreteSignal". - Then add an extension element like this:
<UAVariable DataType="Boolean" ParentNodeId="ns=1;i=5005" ValueRank="-2" NodeId="ns=1;i=6013" BrowseName="3:TwoStateDiscreteSignal" AccessLevel="3"> <DisplayName>TwoStateDiscreteSignal</DisplayName> <References> <Reference ReferenceType="HasTypeDefinition">ns=3;i=1141</Reference> <Reference ReferenceType="HasComponent" IsForward="false">ns=1;i=5005</Reference> <Reference ReferenceType="Organizes" IsForward="false">ns=1;i=5005</Reference> </References> <Extensions> <Extension> <AttributeSource xmlns="http://phoenixcontact.com/OpcUA/2019/NodeSetExtensions.xsd" GdsValueAttribute="Arp.Plc.Eclr/Main1.DI1.Value"/> </Extension> </Extensions> </UAVariable> - Enter the instance path of the variable into the
GdsValueAttribute. - Copy the NodeSet file and restart the PLC (or download a changed project) in order to restart the OPC UA Server.
TheTwoStateDiscreteSignalvariable node should have the same value as the PLC variable.
Note that the variable type is different: The PLC variable is of typeBaseDataVariableTypebut the PA-DIM variable node is of typeTwoStateDiscreteSignalVariableTypewhich has additional properties and subvariables. A complete implementation would add similar extensions for the subvariables, and the PLC project could use a function block for the implementation that can be instantiated for all PA-DIM signals of this kind.
Note: Since the additional properties and subvariables are optional, they need to be added to the address space manually if desired.
- To do this, extend the PLC project with a new boolean variable for the
-
Referencing DI properties
Another option to get real values to the new instance space is to reference complete properties so that they appear in two places. The
PADIMComponenthas aSerialNumberproperty which is already defined in the AXC F 2152 device. In this step we want to change the NodeSet so that both objects point to the same property. Since UaModeler does not support this replacement we do it in the NodeSet.xml file directly:- First, add the namespace for the Phoenix Contact devices (
"http://phoenixcontact.com/OpcUA/PLCnext/Devices/") to the end of the namespace list. It is the 5th entry in the list so we get the namespace index5. - Then search for the old
SerialNumberproperty (it has theNodeId"ns=1;i=6008") and remove it. - Now replace the reference to the
SerialNumberproperty:
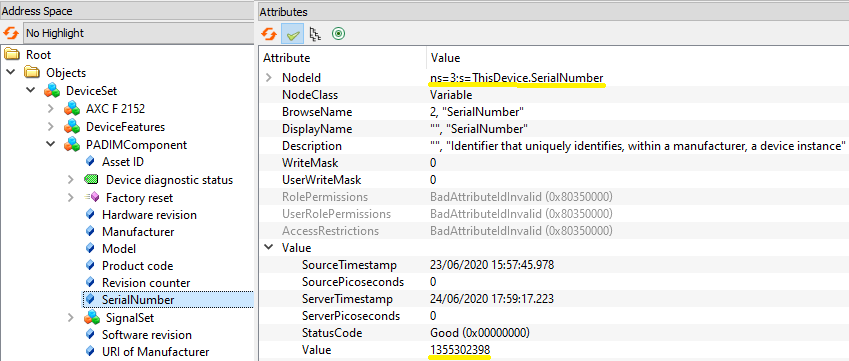
Find the Reference to theNodeId"ns=1;i=6008"and replace it with the AXC F 2152SerialNumberproperty"ns=5;s=ThisDevice.SerialNumber"(itsNodeIdcan be determined with UaExpert).
Note: You have to change the namespace index to5since the namespace on the running server has a different position in the namespace array than the namespace in the document. As a result we see the serial number of the AXC F 2152 in the newPADIMComponent:
- First, add the namespace for the Phoenix Contact devices (
-
Implementing a method as PLC function block
Another big part of bringing the static information model to live is the support for methods. The PA-DIM example already has a method called "Factory reset". It gets a single input parameter which is an enumeration.
- To support this, add a new function block to the PLC project.
It gets the input parameter of the method as input parameter with a compatible type (same binary representation). - Additionally, some special variables need to be added:
UA_MethodStatefor the state of the method execution; optionally theUA_StatusCodethat the UA Method should return. The status code is of typeUA_StatusCodeEnumwhich is already defined by the PLC. The variable declaration could look like this:
A minimal implementation of the function block looks like this:
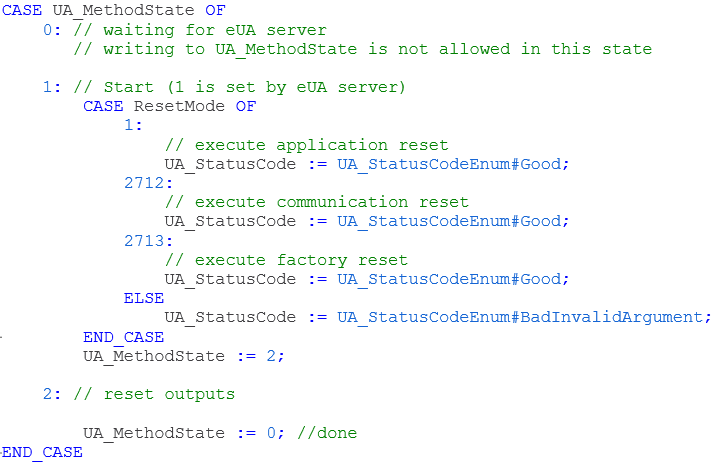
When a UA client calls the method theUA_MethodStatevariable is set to1by the UA server. After that it can be freely used by the function block.
If the variable is reset to0the UA server takes the status code and returns the method call to the UA client.- Connecting the method of the PA-DIM model with this function block is similar to connecting variables: You just need to add an extension to the desired
UAMethodelement in the instance NodeSet file like this:
Note: The<UAMethod ParentNodeId="ns=1;i=5002" NodeId="ns=1;i=7001" BrowseName="3:FactoryReset" MethodDeclarationId="ns=3;i=1028"> <DisplayName>Factory reset</DisplayName> <References> <Reference ReferenceType="HasComponent" IsForward="false">ns=1;i=5002</Reference> <Reference ReferenceType="HasDictionaryEntry">ns=4;s=0112/2///61987#ABN609#001</Reference> <Reference ReferenceType="HasProperty">ns=1;i=6012</Reference> </References> <Extensions> <Extension> <MethodTarget xmlns="http://phoenixcontact.com/OpcUA/2019/NodeSetExtensions.xsd" FunctionBlock="Arp.Plc.Eclr/Main1.FactoryReset"/> </Extension> </Extensions> </UAMethod>FunctionBlockattribute needs to be the instance path to the function block instance.
- Restart (or download changes to the PLC) in order to restart the UA server.
- To support this, add a new function block to the PLC project.
So, that's it.
Use a UA client like UaExpert to call the method that is implemented in the PLC.