Starting up the AXC F XT ML 1000 module
Available on AXC F 3152 with firmware 2022.0 LTS only
Requirements
- The AXC F XT ML 1000 is installed and the supply voltage is connected (see AXC F XT ML 1000 data sheet).
- A firmware version 2022.0 LTS is installed on the AXC F 3152.
Note: For controllers with firmware versions from 2022.6, use a container (e. g., docker) including Python 3.9.
- In PLCnext Engineer:
- A project has been created
- The IP settings have been configured
- A connection to the controller has been established
- For the installation of some of the required components the AXC F 3152 must be connected to the Internet.
 Security note: Only connect the controller to the Internet if this is absolutely necessary.
An Internet connection always entails the risk of unauthorized access. You must take organizational and technical measures to protect the controller against unauthorized access.
For details see Industrial Security Guideline in the PLCnext Technology ‑ Security Info Center.

Adding necessary files to the controller
- Download the file ML1000_package.zip from the Phoenix Contact website.
The package contains the files libedgetpu.so.1 and libflatbuffers.so.1 as well as the folder PROTO.
- Unzip the ML1000_package.zip file to a directory on your PC.
- Open an SFTP client software (e.g., WinSCP).
- If necessary, enter the IP address of the controller in the Computer name input field.
- Log in as an administrator.
- Open the shell using a command line tool (e.g., PuTTY or Tera Term).
- Log in as an administrator.
- Change to the /usr/lib directory on the controller (command:
cd /usr/lib). - Add the files libedgetpu.so.1 and libflatbuffers.so.1 to the /usr/lib directory on the AXC F 3152 controller.
Note: The PROTO folder will be used later, see Adding the PROTO folder to the controller.
Checking the accessibility
After you have added the files libedgetpu.so.1 and libflatbuffers.so.1 to the /usr/lib directory, check whether the AXC F XT ML 1000 module is accessible:
- Enter the command
lspci -nn | grep 089a.
↪ If the AXC F XT ML 1000 is accessible without error, the module will send a corresponding response, e.g.
07:00.0 System peripheral [0880]: Device [1ac1:089a]
↪ If the extension module is not accessible, you will receive an error message.- In this case check whether the AXC F XT ML 1000 module is correctly installed and whether the supply voltage is connected, see data sheet.
Installing the Python Basics app
The Python Basics app is a free app which you can get via the PLCnext Store. The app contains some typical Python packages for machine-learning applications.
- For online installation, proceed as described in Online installing a free app .
AXC F 3152: Internet connection required
- For offline installation, proceed as described in Offline installing a free app .
Installing Python packages manually
Note: If you have already installed the Python Basics app and you don't want to install further Python packages, you can skip this section.
Installing Pip for Python
- Connect the AXC F 3152 controller to the Internet.
- Enter the command
curl https://bootstrap.pypa.io/get-pip.py -o get-pip.py. - Then enter the command
python3 get-pip.py.
Installing Python packages
- Install the desired Python packages, for example the PyCoral API
(command:pip3 install --extra-index-url https://google-coral.github.io/py-repo/ pycoral).
The PyCoral API contains the following Python packages:
- numpy
- pillow
- pycoral
- tflite_runtime
Downloading and installing a sample application
You can install a sample application from Google to familiarize yourself with the functionality of the AXC F XT ML 1000 module. The sample application consists of an image recognition for the classification of bird species.
- Create a directory on the controller to store the sample application and change into the newly created directory
(command:mkdir coral && cd coral). - Download the sample application to the directory
(command:git clone https://github.com/google-coral/pycoral.git). - Change to the directory opt/plcnext/coral/pycoral (command:
cd pycoral). - Install the sample application
(command:bash examples/install_requirements.sh classify_image.py). - Disconnect the AXC F 3152 controller from the Internet.
Executing the sample application
- Execute the image classifier and select the photo of a bird (e.g., the photo of a parrot (parrot.jpg file)) whose bird species you want to classify
(command:
python3 examples/classify_image.py \).
--model test_data/mobilenet_v2_1.0_224_inat_bird_quant_edgetpu.tflite \
--labels test_data/inat_bird_labels.txt \
--input test_data/parrot.jpg
The sample application returns the following result for the parrot.jpg file:
INFO: Initialized TensorFlow Lite runtime.
----INFERENCE TIME----
Note: The first inference on Edge TPU is slow because it includes loading the model into Edge TPU memory.
11.8ms
3.0ms
2.8ms
2.9ms
2.9ms
-------RESULTS--------
Ara macao (Scarlet Macaw): 0.75781
The parrot was classified as the bird species called Ara macao (Scarlet Macaw).
Transferring the results to the PLCnext Engineer application
You can transfer the results of machine-learning applications to your PLCnext Engineer application for further processing. The transferred results are mapped as variables to PLCnext Engineer.
Recommended: Use the integrated gRPC server of the AXC F 3152 to transfer the results to the corresponding variables, see Using gRPC communication.
To map the results of a machine-learning application to the variables of your PLCnext Engineer application, proceed as follows:
Creating the required variables
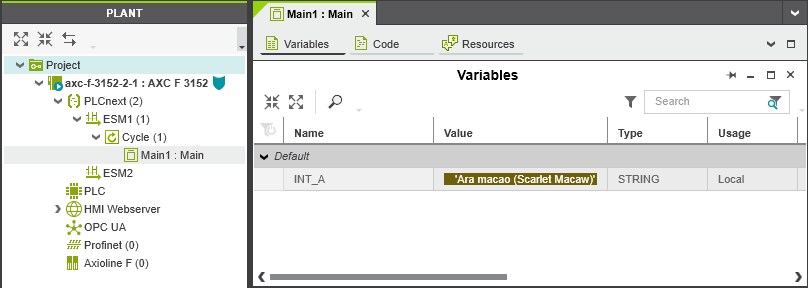
- For each result create a corresponding local variable in the POU of your PLCnext Engineer application.
Hide the exampleShow an exampleExample: Local variable INT_A of type STRING 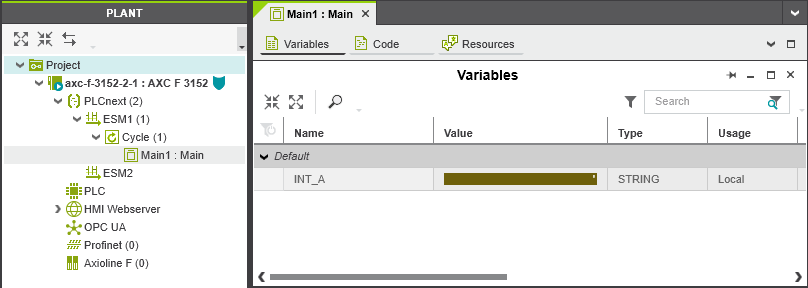
- Instantiate the program.
- Transfer the PLCnext Engineer application to the controller.
Installing the gprcio and protobuf software components
For the communication between the machine-learning application (e.g. a Python application) and the gRPC server of the AXC F 3152 controller you have to install the software components gprcio and protobuf:
- Open the shell.
- Install the software component grpcio (command:
pip3 install grpcio).
(Note: If you have installed the Python Basic app, grpcio is already installed). - Install the software component protobuf (command:
pip3 install protobuf). - Add the PROTO folder (part of the ML1000_package.zip file) to the /home/root/coral/pycoral/examples directory on the AXC F 3152 controller.
Making changes in the machine-learning application
To transfer the results of the machine-learning application into your PLCnext Engineer application and to map them to the corresponding variables you have to change the machine-learning application as follows:
- Open the classify_image.py file in the /home/root/coral/pycoral/examples directory.
- Extend the source code of the machine-learning application with the following lines of code:
Importing necessary modules:
import grpc
from google.protobuf.empty_pb2 import Empty
from PROTO.Authentication_pb2 import CreateSessionRequest
from PROTO.Authentication_pb2_grpc import AuthenticationStub
from PROTO.IDataAccessService_pb2 import IDataAccessServiceReadSingleRequest, \
    IDataAccessServiceReadRequest, IDataAccessServiceWriteSingleRequest, IDataAccessServiceWriteRequest
from PROTO.IDataAccessService_pb2_grpc import IDataAccessServiceStub
from PROTO.PLCnextBase_pb2 import CoreType
from PROTO.ErrorCode_pb2 import ErrorCode
Opening a gRPC channel:
channel=grpc.insecure_channel(“unix:/run/plcnext/grpc.sock“)Defining the function to describe a variable:
def WriteSingle_StringValue(P_PortName,P_StringValue):
    stub=IDataAccessServiceStub(channel)
    response1= IDataAccessServiceWriteSingleRequest()
    response1.data.PortName= P_PortName
    response1.data.Value.TypeCode=19
    response1.data.Value.StringValue=P_StringValue
    response=stub.WriteSingle(response1)
    return response
Writing the result into a variable (in the example: variable INT_A):
result=('%s' % (labels.get(c.id, c.id)))
WriteSingle_StringValue(“Arp.Plc.Eclr/Main1.INT_A“, result)
Executing the machine-learning application
- Execute the machine-learning application.
↪ The results are mapped to the corresponding variables in your PLCnext Engineer application.
Hide the exampleShow an exampleExample: Result for parrot.jpg file mapped to variable INT_A