Creating a new C++ project in Eclipse®
Suitable from 2019.0 LTS up to 2021.6 – for newer firmware see Working with Eclipse
This section describes the general approach to C++ programming on PLCnext Technology with Eclipse® IDE. Of course, you might use any other IDE or code editor instead.
Creating a new C++ project
- Open the File → New → Project... menu. Hide screenshotClick to see the screenshot

- The New Project window opens.
- Select the PLCnext C++ Project wizard from the selection list and confirm your selection with Next. Hide screenshotClick to see the screenshot

- The C++ Project window opens.
- Enter a project name in the input field.
- For this example select PLCnext C++ Project. Please find more information on the project types read this.
- In the Toolchains area, select the PLCnext C++ Toolchain entry and confirm with Next. Hide screenshotClick to see the screenshot

- Enter a name for the program and component in the corresponding input fields (Note: observe the Naming conventions). Hide ScreenshotClick to see the screenshot

- Select the desired controller and firmware status for the project.
- You can choose more than one firmware version and several targets to be supported by the project. The PLCnext CLI will build your project for all of them automatically and put them into a single PLCnext Engineer library.
Hide screenshotClick to see the screenshot
- You can change the selection of the desired controller and the corresponding firmware status after the project has been created.
- You can choose more than one firmware version and several targets to be supported by the project. The PLCnext CLI will build your project for all of them automatically and put them into a single PLCnext Engineer library.
- Open the Project → Properties menu.
- Select the PLCnext Targets option.
- Remove controllers or add new controllers and their firmware version.
- Click the Finish button.
Creating a C++ program
To create a C++ program using Eclipse®, which can be imported as a library into PLCnext Engineer, you must first prepare a new project in accordance with the description above.
The created project has a defined structure in which the C++ program is created as seen in this example:

To create a program, proceed as follows:
- Open the *.cpp source file.
- Program the code to be executed during each ESM task cycle in the
Execute()function
(see this comment://TODO implement program).
For additional information on programming in C++, see the basic C++ programs topics.
↪ After instantiating a program, the assigned ESM task calls theExecute()function of the program instance in each cycle.
Adding or removing components and programs
Adding a component
- Right click on the project.
- Select New → PLCnext C++ Component.

- Give the component a name. The namespace is by default the project namespace.
- Assign the component to a project and click Finish.

Adding a program
- Right click on the project.
- Select New → PLCnext C++ Program.
- Give the program a name. The namespace is by default the project namespace.
- Assign the program to a project and select a parent component.
- Click Finish and you will get the program source and header file.

Deleting a program
- To delete a program simply delete the corresponding source and header file.
- Select the two files, right click on them and choose delete in the menu.

Deleting a component
- Delete the corresponding source and header file of your component.

- Delete all programs assigned to this deleted component, or reassign them to another existing component.
To reassign a program, open the header file of the program and change the references to the component that owns this program. Use the Find/Replace function of Eclipse and search and replace all references by the new component name.

- Remove all intermediate files of this deleted component from previous builds.
For this simply right click on your project and select Clean Project.

Compiling the project
Preparing the settings
PLCnext Engineer recommends to make the following setting so that your files are saved automatically before you execute the Build Project option:
- In Eclipse®, open the Window → menu.
- Select General → Workspace → Build.
- Enable the Save automatically before build checkbox.
- Make this setting separately for each workspace.
Compiling
- Switch to the Project Explorer to compile the project.
- Right-click to open the context menu for the project folder (in the example: FirstProject1).
- In the context menu, click on the Build Project option (Screenshot belowshow where to find that), or click on the
 button in the tool bar (Screenshot belowshow where to find that)
↪ Successful compilation of the project or possible error messages are displayed on the Console tab:

Note for the compiler warningNote for the compiler warning
↪ If compilation was successful, a shared object (*.so) is generated.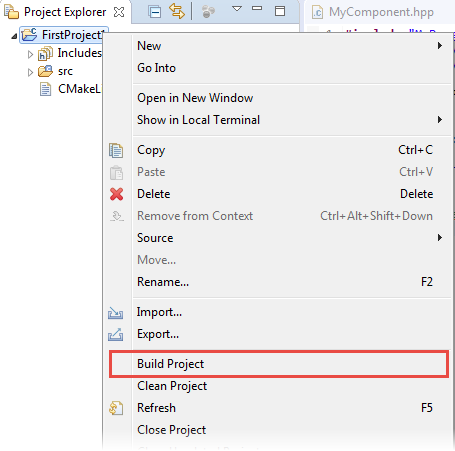

For each defined port, you receive the
offsetof within non-standard-layout typecompiler warning, e.g.:[cmake]: /home/user/Workspace/Counters/intermediate/code/Counters Library.meta.cpp:22:47: warning: offsetof within non-standard-layout type ‘Counters::CppRetain’ is undefined [-Winvalid-offsetof]
To suppress this warning you have to add the following line to your project's CMakeLists.txt:
target_compile_options(NameOfYourLibrary PRIVATE $<$<CXX_COMPILER_ID:GNU>:-Wno-invalid-offsetof>)
Generating a PLCnext Engineer library
To be able to use the program in PLCnext Engineer, you need the *.pcwlx library, which was generated during compilation. The Library Builder automatically generates the *.pcwlx library within the process of compilation (with Build Project, see above). The files are located in the project folder, e.g., C:/Users/<username>/eclipse-workspace/FirstProject/Bin.
- Import the library into your PLCnext Engineer project.
- Assign the programs to a task.
↪ Your programs are ready to run.