Installing IDE plug-ins for PLCnext Technology
In high-level language programming, the common workbench is equipped with a specialized tool for smooth and quick workflows. Well known Integrated Development Environment (IDE) tools are Visual Studio® (available for Windows®) or Eclipse® (available for Windows® and Linux®).
As part of the PLCnext toolchain, Phoenix Contact offers an Eclipse® add-in and a Visual Studio® extension. They are based on the PLCnext CLI and extend the respective IDE and its graphical user interface (GUI) to support the development process for PLCnext Technology.
Note: The former standalone PLCnext Technology (C#) Development Tools for Visual Studio®
2015 and 2017 is deprecated and won't get updates any more.
Nevertheless, they are still PLCnext Technology (C#) Development Tools for Visual Studio®
2019 available in the Software Archive section at some controller's product pages. Look for hints on former releases in the following instructions.
Visual Studio® extension for PLCnext Technology
![]()
Note: Tutorial videos are embedded from the Phoenix Contact Technical Support YouTube channel. With playing an embedded YouTube video in this platform, you accept the YouTube Terms & Conditions. Even showing the video previews on this page depends on your personal settings. To watch YouTube videos, you have to allow cookies for marketing purposes which will remain on your device. The data gained through these cookies will be used by YouTube to provide video suggestions and advertisements based on your browsing habits, and that data may be made available to other parties.
![]() 03m:11s
03m:11s ![]() HDTV 1080p
HDTV 1080p ![]() English
English ![]() English
English
How to install
Before starting the installation, ensure that the system requirements are met.
PLCnext Control with firmware release:
- 2023.0 LTS or newer
former releasesformer releasesIf you need to stick to a firmware release between 2020.6 and 2022.9 for reasons, you can still use the former extension named
PLCnext Technology Development Tools for Visual Studio 202x.x
with Visual Studio® 2019. For details see Tools.
For C# development Phoenix Contact officially supports:
- Microsoft® Visual Studio® 2019 (all editions, all versions)
- Microsoft® Visual Studio® 2022 (all editions, all versions)
For C++ development Phoenix Contact officially supports:
- Microsoft® Visual Studio® 2019 (all editions, minimal version 16.11.26)
- Microsoft® Visual Studio® 2022 (all editions, minimal version 17.6.2)
These workloads need to be included:
- .Net™ desktop development
- Desktop development with C++
- Linux® development with C++
During PLCnext Technology Toolchain installation, a compatible Visual Studio® extension version is installed:
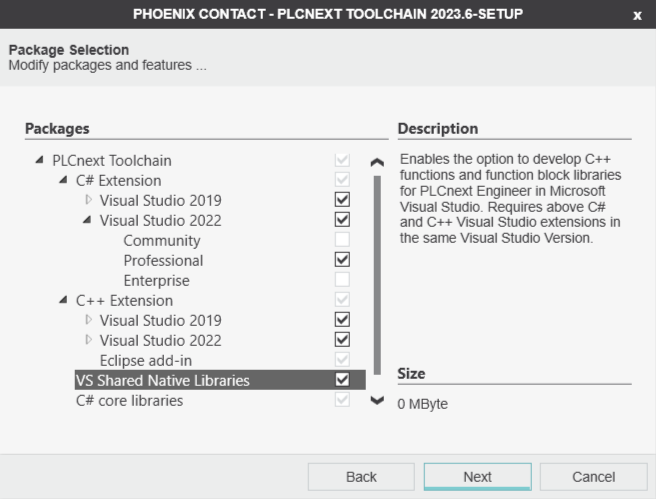
former releasesformer releases
If you need to stick to a firmware release between 2020.6 and 2022.9 for reasons, and want to install the former extension named PLCnext Technology Development Tools for Visual Studio 202x.x
with Visual Studio® 2019, the above dialog box in the installation process of the PLCnext Technology Toolchain shows less options.
Then, the Visual Studio® extension is just copied into an installation folder from where it needs to be installed:
- Navigate to the installation folder of the PLCnext CLI and to the .../ide-plugins/PlcNextVSExtension.vsix installation file.
- Execute the file and follow the installation wizard's instructions; the wizard will automatically check for required versions of Visual Studio® and modules.
Adding the Visual Studio® extension
- Start Visual Studio® and check the installed extensions:
Extensions menu → Manage Extensions → in the left panel click Installed:
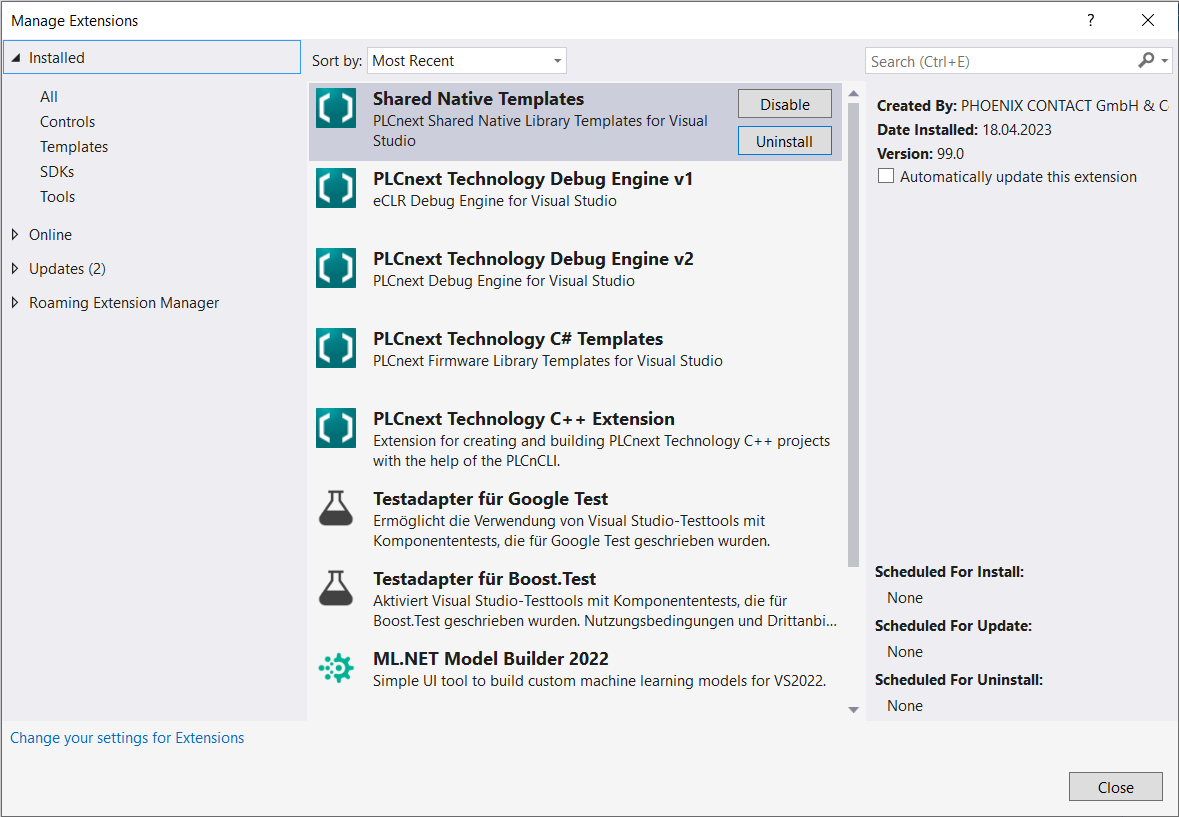
↪ The Visual Studio® extensions are ready for C++ and C# programming and debugging.
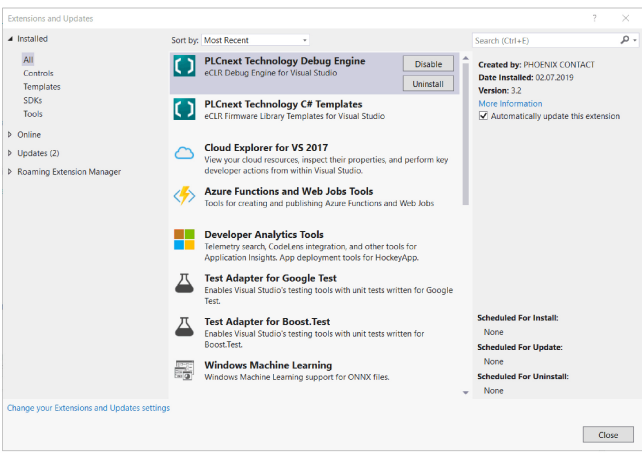
former plug-in releasesformer plug-in releases
- Start Visual Studio® and check the installed extensions:
- Open Tools > Extensions and Updates from the menu bar.
- Make sure that in the Installed section All is selected.
- Scroll down the alphabetical list in the middle to the entries beginning with "PLCnext...".
- If the extensions have been successfully installed, they will displayed there:
Eclipse® add-in for PLCnext Technology
Before starting the installation, ensure that the system requirements are met.
For C++ development Phoenix Contact officially supports:
- Eclipse® IDE for C/C++ Developer
Note: We always test our release with the latest Eclipse® release version 202x.03 or 202x.09, corresponding to the one right before our release date. You can get Eclipse® versions 20xx.03 R and 20xx.09 R from eclipse.org.
 Security Note: To avoid manipulation by third parties, install the Eclipse® IDE in a user-specific folder.
In case of any issues with Eclipse®:
- The Java™ Runtime Environment is required for the Eclipse® IDE.
- If an error code 13 occurs when Java™ is started, check if the correct Java™ version is installed. If you want to use a 64-bit Eclipse® version, you have to use a 64-bit Java™ version, too.
- If you're updating to firmware 2020.0 LTS or newer as an Eclipse® Add-in user, you need to update the Eclipse® Add-in as well:
The Eclipse® Add-in from 2021.6 or newer requires Java version 9 or above, while the Eclipse® IDE still depends on version 8.
Adding the Eclipse® add-in
How to install
- If an earlier Eclipse® add-in version is already installed, uninstall it:
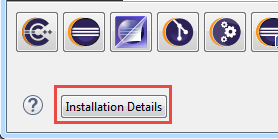
- Open the Help > About Eclipse IDE menu:
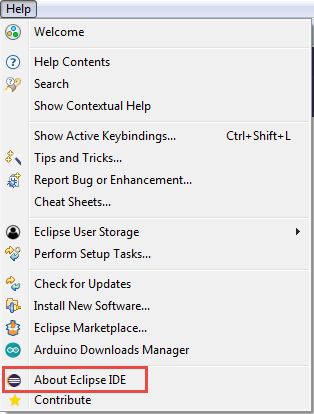
- Click on the Installation Details button.
- Select the earlier add-in versions and uninstall them.
- Open the Help > About Eclipse IDE menu:
- Check the Java® version running on your system:
From the Eclipse® add-in 2020.0 LTS, Java v11 is required; if an update is needed:- Finding the instructions
Due to the fact that beginning with Java 8 Oracle requires subscription, you need to install and maintain later versions manually. You can find the instruction on the OpenJDK website - it's the first instruction at the top. - Getting the packages
To get the packages, we can recommend these two pages:- Oracle's Java.net, providing the current version and some early-access releases for future versions
- AdoptOpenJDK, providing OpenJDK binaries and a build infrastructure
- Setting up the source in Eclipse®
After installing the JDK version 11 or later, you have two options to set it up in Eclipse®:- You can edit the eclipse.ini file, so that Eclipse is launched with the newer Java version (instructions see MATSim.org)
- You can set your system environment variable
JAVA_HOMEto the new JDK (instructions see Opsgenie for example)
- Finding the instructions
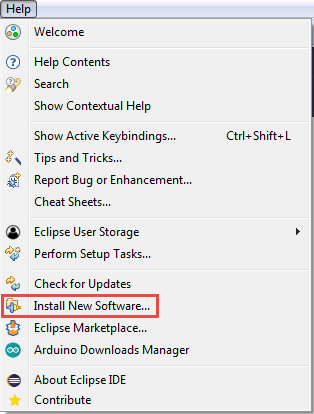
- Install the add-in:
- Start Eclipse® and open the Help → Install New Software... menu.
- In the Install dialog click on Add... to select the path to the directory of the add-in.
- In the Add Repository dialog, click on Archive and select the archive of the add-in.
You will find it in the installation folder of the PLCnext CLI under .../ide-plugins/com.phoenixcontact.plcnext.updatesite.zip. - Enter a name of your choice in the Name: input field and confirm with clicking the Add button of the pop-up dialog:
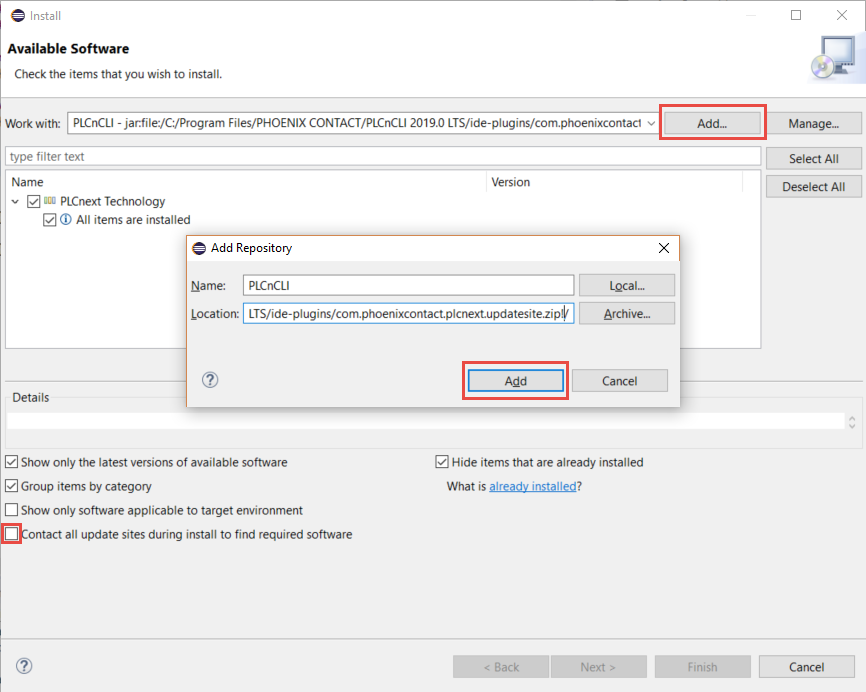
- Disable the Contact all update sites during install to find required software checkbox in the lower third of the dialog.
- Click on the Next button.
- Read and accept the license agreements, then click Finish to complete the installation.
- Restart Eclipse® when you are prompted to do so.
↪ The Eclipse® add-in is installed.
- Start Eclipse® and open the Help → Install New Software... menu.
Updating the Eclipse® add-in
- Update the PLCnext CLI first (see Installing the PLCnext toolchain) into the same directory as before.
Note: If you choose to install the newer PLCnext CLI in another directory, follow the instructions for an initial installation of the PLCnext CLI (see Installing the PLCnext toolchain) - Restart Eclipse®.
↪ On startup, Eclipse® detects the new add-in release and prompts you to update.
See Also