Remote debugging of C# code
Works for PLCnext Control devices running firmware 2019.0 LTS up to 2022.9 -
for newer firmware see Remote debugging from 2023
Because PLCnext Technology includes an implementation of eCLR, you have the option to establish a C# remote session on a PLCnext Control.
This topic describes the basic steps needed for setting up a remote debug session and establishing a direct connection to a running application by means of Microsoft Visual Studio®.
How to debug
Tutorial videos
![]()
Note: Tutorial videos are embedded from the Phoenix Contact Technical Support YouTube channel. With playing an embedded YouTube video in this platform, you accept the YouTube Terms & Conditions. Even showing the video previews on this page depends on your personal settings. To watch YouTube videos, you have to allow cookies for marketing purposes which will remain on your device. The data gained through these cookies will be used by YouTube to provide video suggestions and advertisements based on your browsing habits, and that data may be made available to other parties.
| 03m:16s | HDTV 720p | English | English |
| 03m:31s | HDTV 720p | English | English |
Step-by-step instructions
Preconditions for these instructionsShow preconditions for this instructions
Hardware used here
- AXC F 2152 Starterkit
- Computer connected via Ethernet LAN
Software used here
- Microsoft® Windows® 10
- Internet browser
- WinSCP
- Microsoft® Visual Studio® 2015 and 2017
- PLCnext Technology Development Tools for Visual Studio
- PLCnext Engineer
Additional instructions
For further information on the debug functions in PLCnext Engineer and in Microsoft® Visual Studio®, please refer to their associated documentation.
Note: All steps in the following description are based on the default settings. Consider all changes made by the user.
Currently, the C# debugging function does not feature an interface for logging on to the controller. To debug the C# code, you have to deactivate the user authentication in the WBM on the controller (for additional information, please refer to the WBM section).
-
Disable the user authentication

Risk of unauthorized access
To debug the C# code, you have to deactivate the user authentication on the controller.
With security functions switched off, the controller must not be used for live operation.
Make sure to switch on security functions after debugging.
- Log in to the Web-based Management on your PLCnext Control via a browser.
- Disable the user authentication:
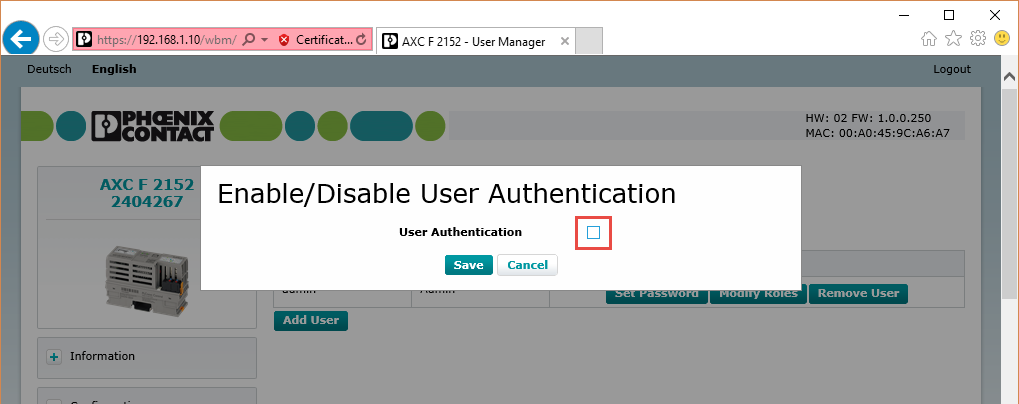
- Apply the changes and close the browser.
-
Open a port and deactivate TLS
- In WinSCP, establish a connection to the IP address of the controller with root privileges:
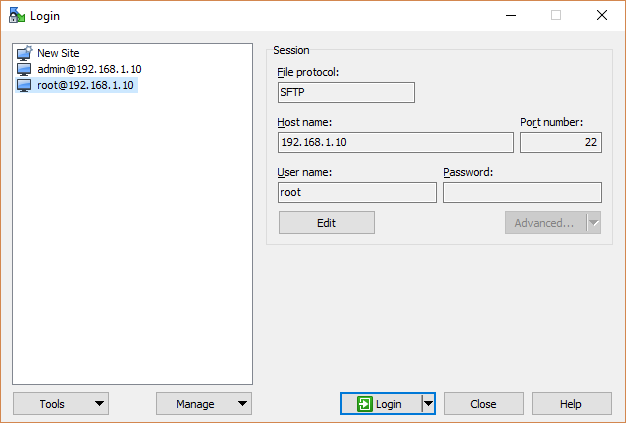
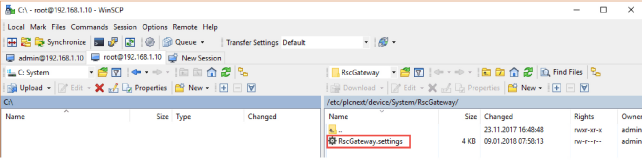
- Open this directory: /etc/plcnext/device/System/RscGateway/.
- Open the RscGateway.settings file:
- Scroll to the line with
<TcpGatewaySettings...>. - Insert this line of code as shown here in the example below:
<TcpGatewaySettings gatewayId="0" tcpPort="41101" sessionTimeout="300000" encrypted="false" />
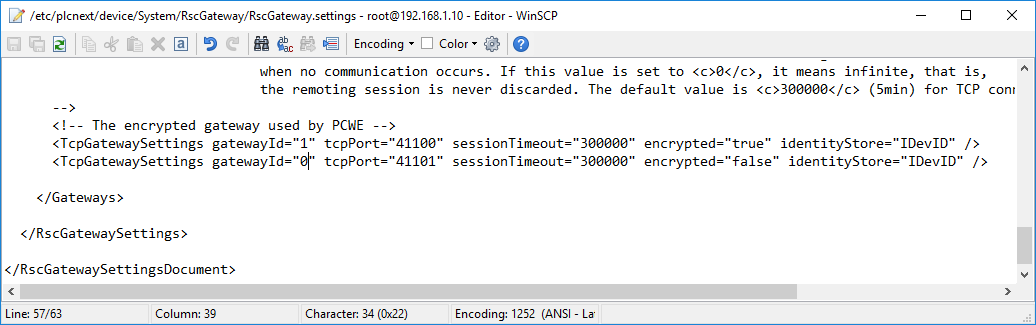
- Save and close the file.
- Restart the controller.
- In WinSCP, establish a connection to the IP address of the controller with root privileges:
-
Prepare a project
- Create or open a project in Visual Studio and set it up as shown in the C# programming section.
- Import the resulting library into PLCnext Engineer.
-
Activate debug mode
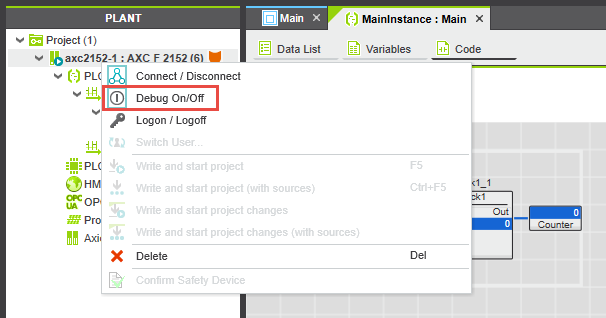
- Connect PLCnext Engineer to the controller.
- In the PLANT area, right-click on the controller.
- In the context menu, select Debug On/Off:

Risk of personal injury or damage to equipment
Using the debugging function can result in an unsafe process interruption.
Ensure that there is no risk of personal injury or damage to the equipment.
-
Attach Visual Studio to the process
- In Visual Studio open the Debug → Attach to Process... menu.
- From the Transport drop-down list, select the eCLR Device entry.
- From the Connection target drop-down list, select the <Current_Controler_IP>:41101 (Last PlcNext Engineer connect) entry.
This will take the settings of your last debug session with the PLCnext engineer and a PLCnext controller.
If you configuration does not work or has changed recently, you can update it as following:- Click on the Find... button.
- In the Attach to eCLR dialog that opens, click Load to get the settings of a recent PLCnext Engineer connection to the controller.
- If this didn't work either, you can still set the IP address and port, as well as the path to the binary image manually:
- Enter the IP address of the controller and port number (e.g.,
192.168.1.10:41101). - Select the *.img binary image under the following path:
C:\Users\Public\Documents\PLCnext Engineer\Version\Binaries\PROJECT1@binary\eCLR\
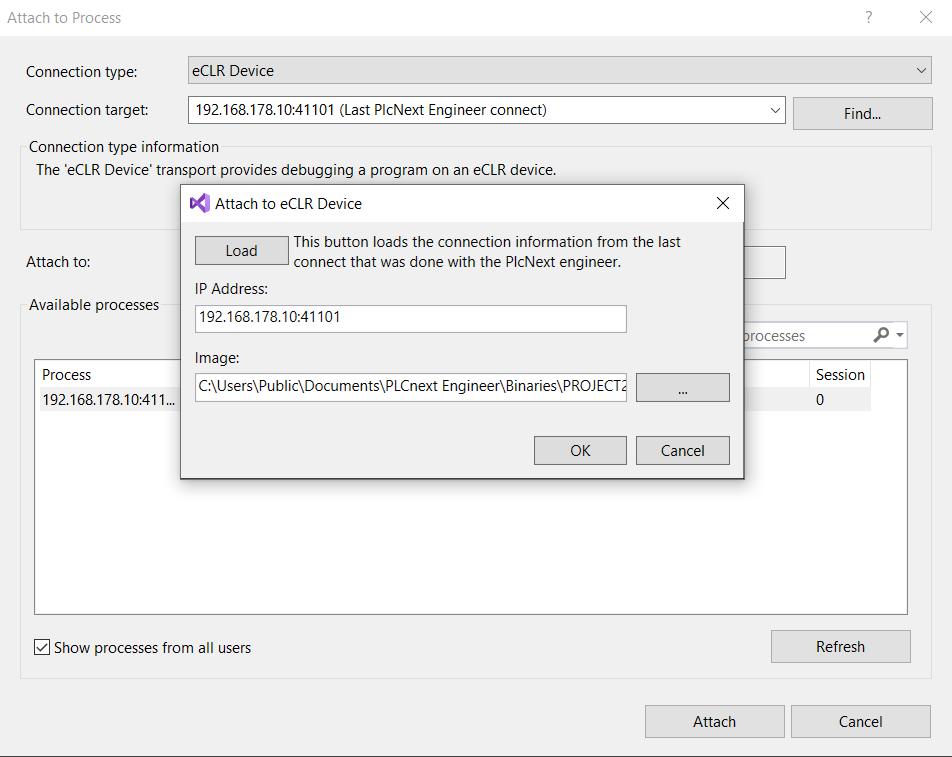
- Choose the image currently running on the controller.
- Confirm your selection with OK.
- Enter the IP address of the controller and port number (e.g.,
- After setting the IP address and port, and the path for the binary image, click the Attach button.
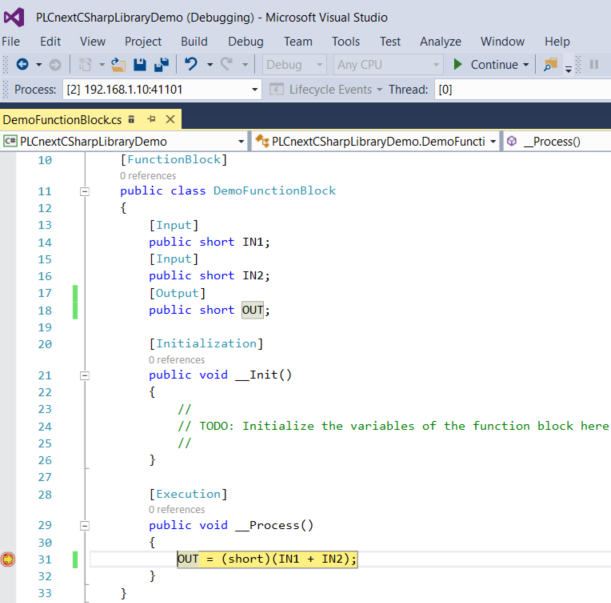
- In Visual Studio, add breakpoints and execute the code.
- Execution of the code will stop at the breakpoint. You can now evaluate the current variable values:
- Use the functions in the Visual Studio toolbar to jump to the next breakpoint or continue processing of the code:

-
Make changes to the code while debugging
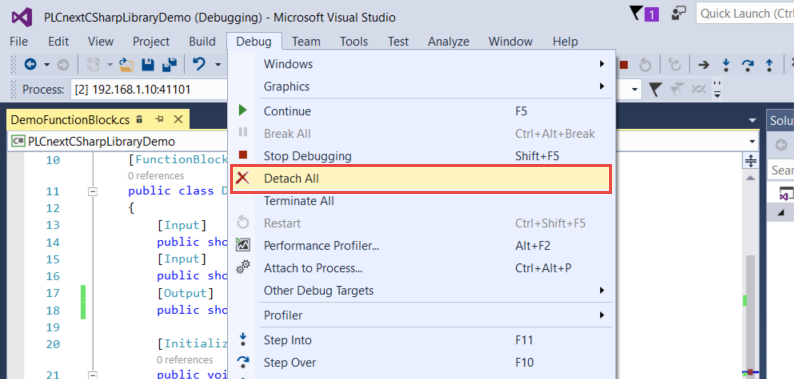
If you want to make changes to the code within the framework of debugging, you have to disconnect (detach) the process connection:
- In Visual Studio, choose Debug → Detach All from the menu:
- Make changes to the code and save them.
- Recompile the project; to do so, open the Build → Rebuild menu and choose your project.
- Then, switch to PLCnext Engineer.
- PLCnext Engineer will already have recognized the changes and prompts you to save the project.
Note: If the inputs/outputs have been changed in the code, errors might occur in PLCnext Engineer. If necessary, correct them in PLCnext Engineer, too. - Transfer the changed project to the controller.
- Then, reconnect Visual Studio to the process (see step 5 above) and continue debugging your code.
- In Visual Studio, choose Debug → Detach All from the menu:
-
Revert to secure mode
When finished with debugging, revert the security functions before using the controller in live operation:
- Delete the unencrypted TCP port by removing the RscGateway.settings file in the /media/rfs/rw/upperdir/etc/plcnext/device/System/RscGateway/ directory.
Note: Just editing this file back to its factory default state may cause trouble when updating the firmware later, due to changes in the Overlay File System (for details see Note when changing firmware files). - Reboot the PLC.
- Enable the User Authentication in the WBM.
- Delete the unencrypted TCP port by removing the RscGateway.settings file in the /media/rfs/rw/upperdir/etc/plcnext/device/System/RscGateway/ directory.