

This is an update to an article that was originally published in November 2018.
All PLCnext Controls include an embedded OPC UA server. This server, like all OPC UA servers, includes the option to establish secure connections with clients using Public Key Cryptography. This guide describes how to use your own security certificate (including your own private key) to set up a secure OPC UA connection with a PLCnext Control.
Note: This guide describes procedures involving the use of private encryption keys. It is the responsibility of users of this guide to ensure that their private keys are stored securely, both in their master certificate repository and on the PLCnext Technology controller.
For general information on how to manage OPC UA Server certificates, please refer to:
- The OPC UA Settings section of PLCnext Engineer’s integrated help system.
- The PLCnext Info Center:
Introduction
The PLCnext Control embedded OPC UA Server requires X.509 certificates to ensure trusted communication with OPC UA clients. There are four main types of certificates that can be used:
Option 1 – Automatically generated self-signed certificate.
- The required certificates are automatically created by the PLC.
- Simple to set up.
- Useful for testing and for permanent use on secure LANs.
Option 2 – Manually generated self-signed certificate.
- No additional security benefits over Option 1, but gives the administrator more control over the management of certificates.
Option 3 – Certificate signed by your own Certificate Authority (CA).
- No additional security benefits over Options 1 and 2, but allows more structured management of certificates.
Option 4 – Certificate issued by a trusted Certificate Authority
- Requires the purchase of a certificate from a trusted third-party Certificate Authority like Symantec or GeoTrust. This is the recommended option for public or other unsecure networks, because all clients should accept a certificate signed by a trusted CA.
Prerequisites
To perform the following procedures successfully you’ll need:
- A basic understanding of Public Key Cryptography and X.509 certificates.
- A basic understanding of OPC, and (specifically) OPC UA technology.
The procedures described in this guide were prepared using the following hardware and software:
- AXC F 2152 controller, firmware version 2020.6.1
- PLCnext Engineer version 2020.6
- UAExpert version 1.5.1
- XCA version 2.3.0 with a database already created
Background reading
- Public-key cryptography
- X.509
- Creating X.509 certificates (PDF)
- What is OPC?
- OPC Unified Architecture
- The OPC UA Security Model For Administrators (PDF)
Procedures
Option 1 – Automatically generated self-signed certificate
This is the the default option when creating a new project in PLCnext Engineer.
- Follow the procedure for configuring the OPC UA server in the video on the Technical Support YouTube channel.
This automatically creates a self-signed certificate in the Identity Store named OPC UA-self-signed, which you can see on the PLC’s web-based management page, in the Certificate Authentication window (in the Security section).

Now, when establishing a connection to the OPC UA server from UA Expert, the name of the self-signed certificate “eUAServer@axc-f-2152-1” can be seen:
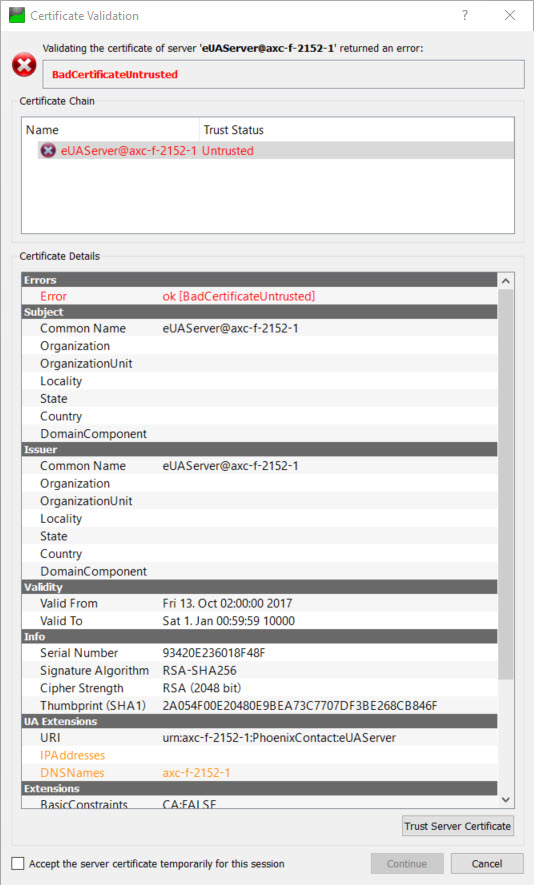
Because the certificate is not signed by a trusted CA, it is necessary for the user to explicitly trust this certficate.
After confirming that the certificate can be trusted, UA Expert may display the error “BadCertificateHostNameInvalid”. This is because the URL that was used to connect to the OPC UA server does not match any entries in either the IPAddresses or DNSnames fields of the certificate (which can be seen in the UA Extensions section above). This can be corrected by adding the corresponding entries to the certificate, which can be done in the OPC UA Settings window in PLCnext Engineer.
Note that, while UA Expert gives the option to ignore BadCertificateHostNameInvalid errors and still connect to the server, many other OPC UA clients will simply refuse to connect when they encounter this error.
Option 2 – Manually generated self-signed certificate
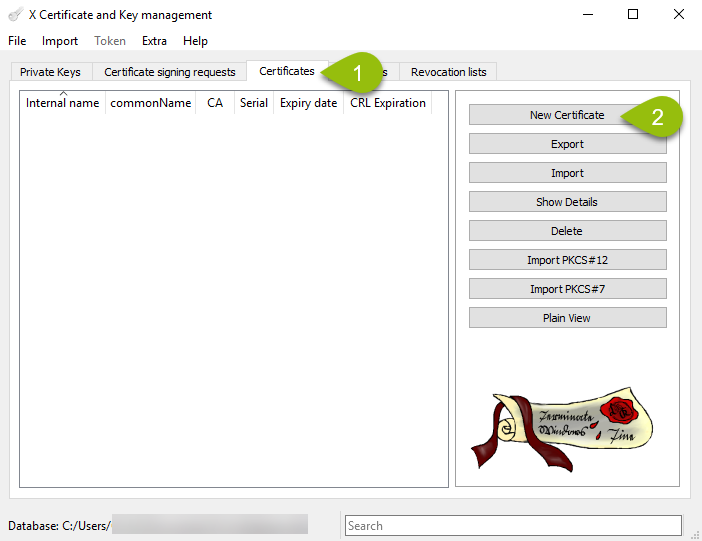
- In XCA, create a new self-signed certificate.
- Open (or create) a database under the menu item “File”.
- In the “Certificates” tab, click the “New Certificate” button:
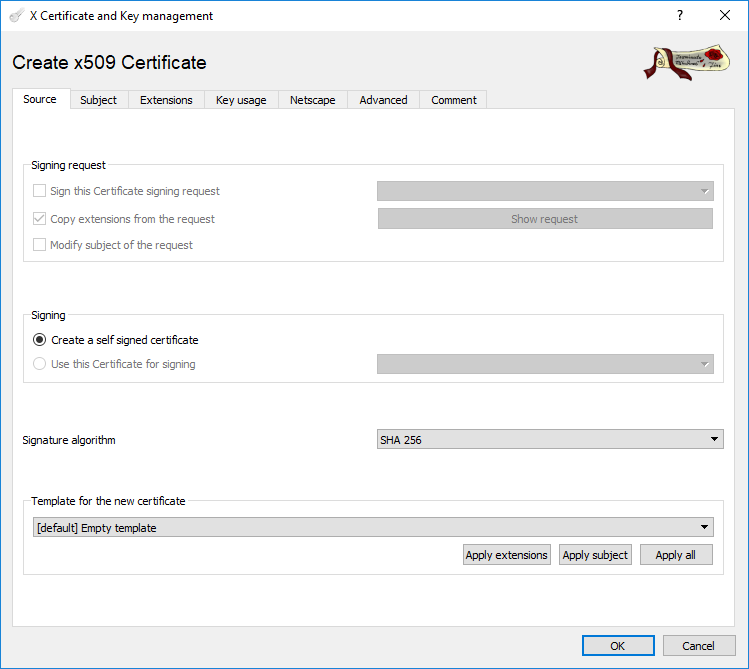
- In the next dialog box, the Source tab will be active. The Signing option “create a self signed certificate” should already checked by default:
- Switch to the “Subject tab” and fill out the fields. An example is shown below.
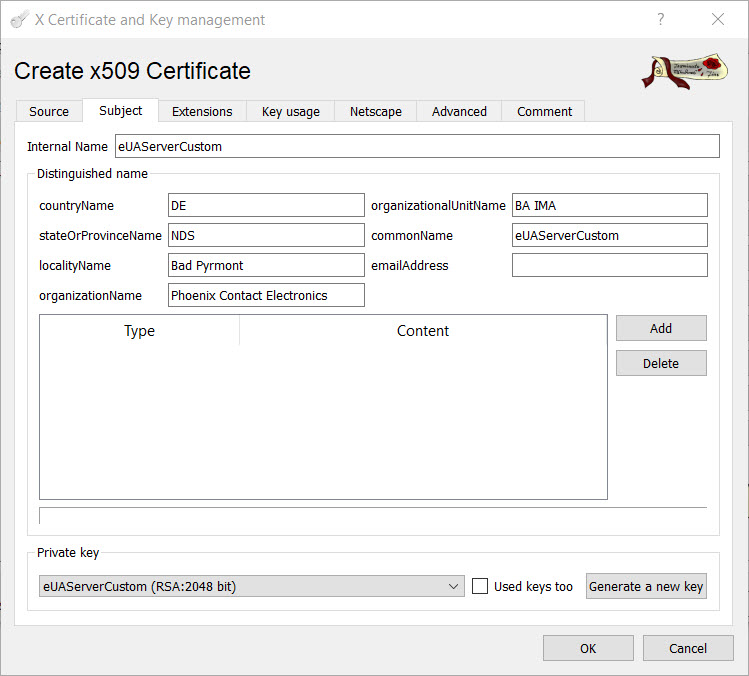
- Click the “Generate a new key” button. This generates a unique private key for this certificate.
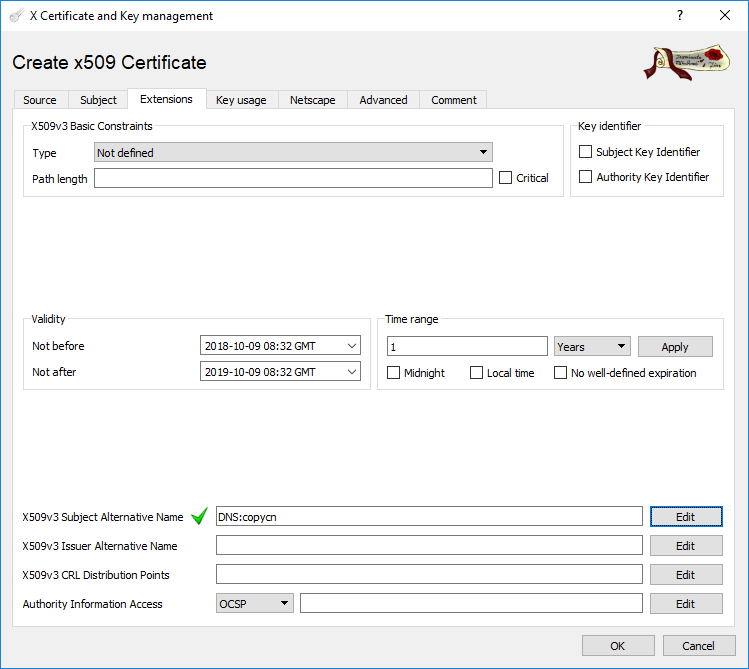
- In the “Extensions” tab, set the Validity of the certificate to the required period and put an entry into the field “X509v3 Subject Alternative Name”. This field must not be empty – this is a requirement of the OPC UA specification. The IPAddresses and DNSnames fields mentioned in Option 1 correspond to these fields
- .
- Click OK to create the certificate.
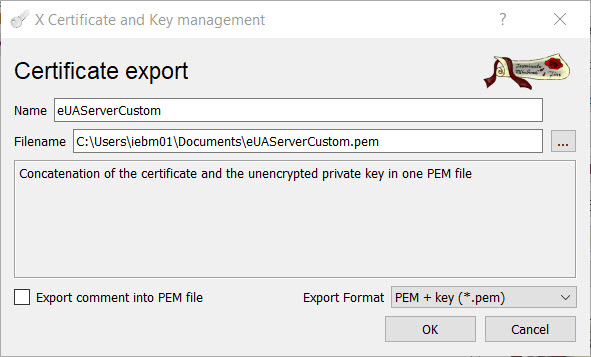
- After the certificate is created, select the certificate in the main XCA window and click “Export”. Export the certificate and the unencrypted private key, in the format “PEM + key (*.pem)”:
- In PLCnext Engineer, change the OPC UA server “Certificate” field from “Self signed by controller” to “File on controller”.
- Download the PLCnext Engineer project to the PLC.
- On the PLC’s web-based management page, navigate to the Certificate Authentication window in the Security section. A new Identity Store named OPC UA-configurable has been created.
- Load the certificate and the key from the file created in Step 2, to the new Identity Store:
- Load the certificate by clicking the “Set” button and selecting the certificate/key file. An error will appear, indicating that the existing Key Pair and the new Certificate do not match.
- Load the private key by clicking the “Set” button and selecting the certificate/key file. The error will disappear.
- Restart the PLCnext Runtime, so that the OPC UA server will pick up the new certificate.
It is now possible to connect a client to the OPC UA server using this manually created self-signed certificate. When connecting using UA Expert, the details of the custom certificate can be seen.
Option 3 – Certificate signed by your own Certificate Authority.
In XCA, it is possible to create your own Certificate Authority (CA), and then sign your certificates using this CA. The additional steps required are described in the document “Creating X.509 certificates”, referenced at the start of this article. Note that, when exporting the .pem file, the export format must be “PEM chain (*.pem)”.
As in Option 2 above, this certificate should be loaded to the OPC UA-configurable identity store.
NOTE: The OPC UA client will complain that the root (CA) Certificate can not be validated, but this error can be ignored.
Option 4 – Certificate issued by a trusted Certificate Authority
In this case, the certificate is purchased from, and signed by, a trusted Certificate Authority. Again, this certificate should be loaded to the OPC UA-configurable identity store. If the CA is known to the OPC UA client, then there should be no warnings or errors when connecting to the OPC UA server.
Managing certificates on a central server
Instead of manually loading security certificates on the PLC, certificates can instead be pushed to the PLC from an OPC UA Global Discovery Server. This helps when managing security certificates on a network containing multiple OPC UA servers.
This topic will be addressed in another post.
Leave a Reply
You must be logged in to post a comment.