
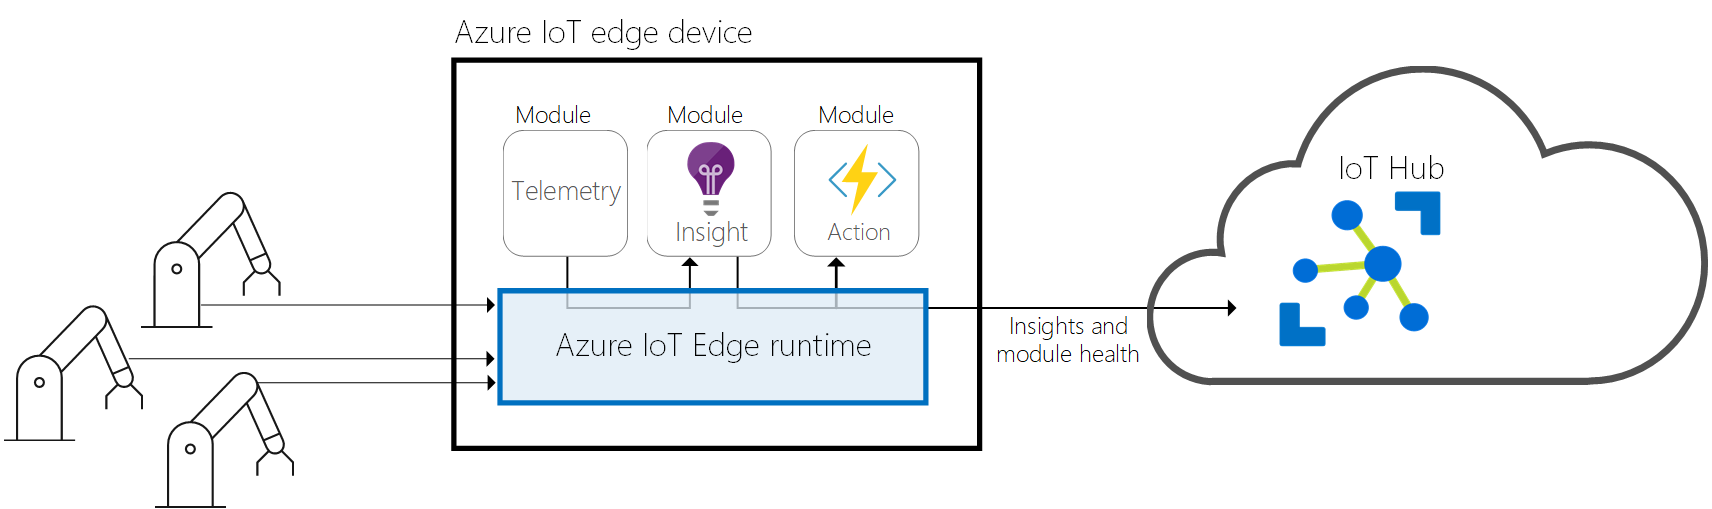
Azure IoT Edge makes it possible to move cloud analytics and costum logic to to “the edge”, in our case to our PLCnext device. This has some benefits in decreasing used bandwidth and latency. With Azure IoT Edge you can develop and deploy your own applications form a central cloud application. In this blog you will learn how to set Azure IoT Edge and some of it’s basic principles.
Introduction
Explaining all the in’s an out’s of the Azure IoT Edge solution may go to far for a Makersblog, but be sure to read yourself in before you continue this blog. On this portal you find all the information you need for getting a good idea of what we are doing in this blog. Let’s go and install the runtime.
Installation
Create an Azure IoT Hub and create an device
Before we start start we first need so setup some thing in the azure portal. I assume you’ve already set up an Azure account.
The first thing we’ll have to do is create a resource group and give it a descriptive name. Click on create a new resource group. If it’s not listed you can press on the “+” button and search for new resource group.

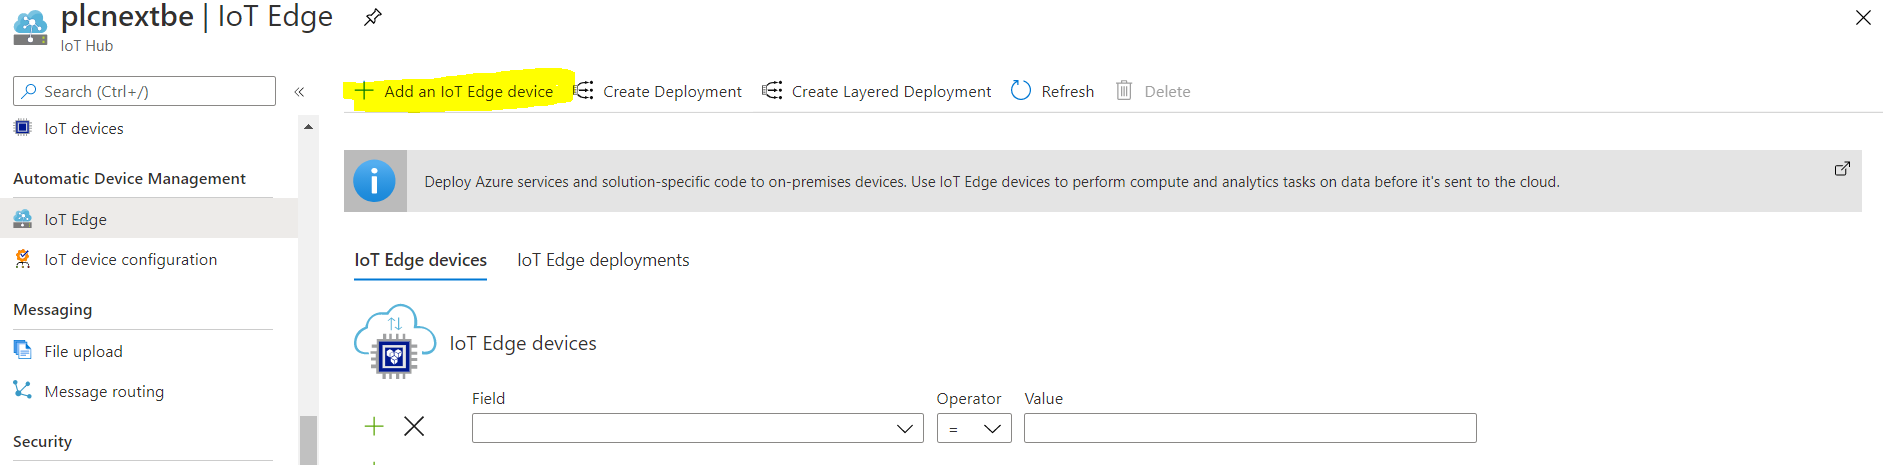
Create a new IoT Hub service. You can have 1 Free IoT Hub service, you might want to change the type from standard to free! Otherwise leave everything on their default settings and proceed with deploying the service. Our final step is creating a IoT Device. Open the service and search in the left panel of the window for IoT Edge. Click on it and create a new IoT Edge device. Give the device an ID, all the other settings can be left on their default values.
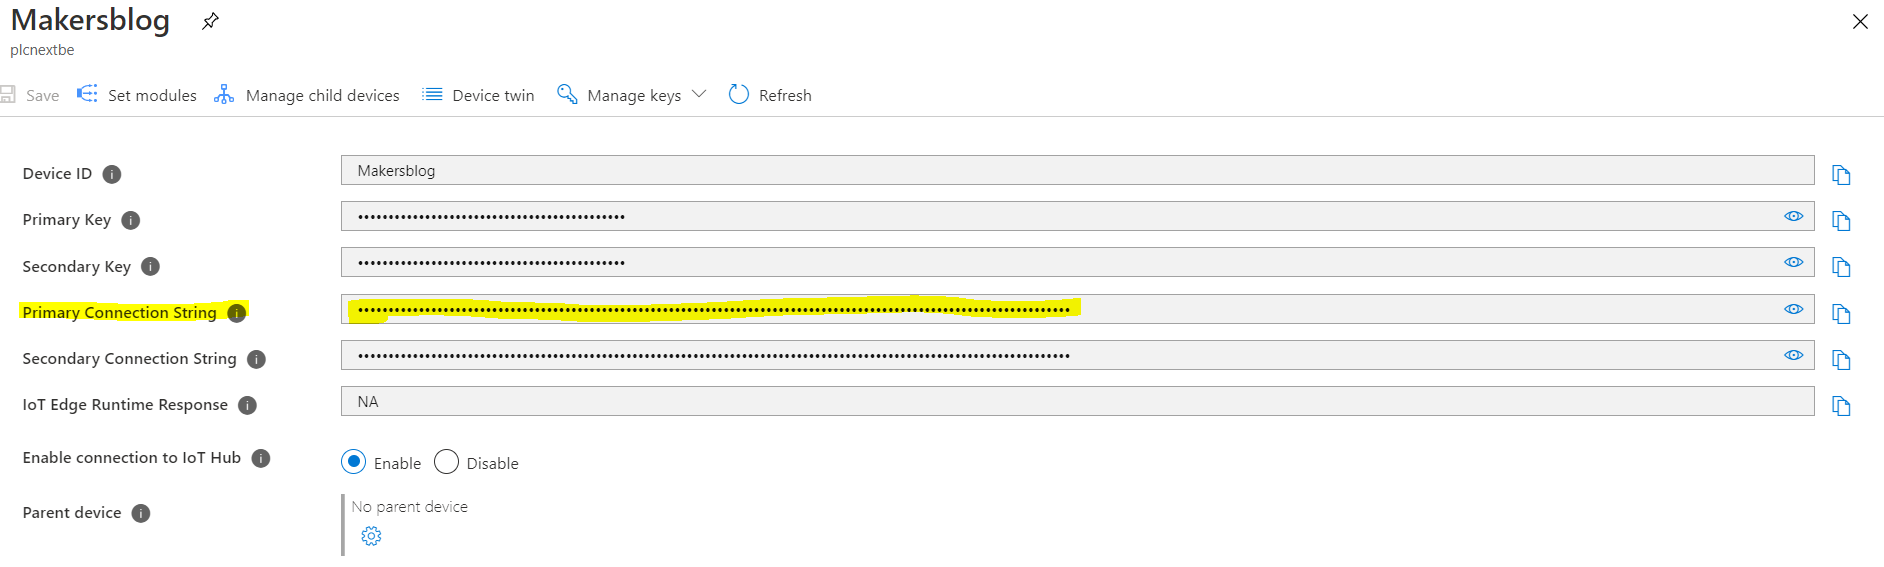
Click on the newly create device and take note of the “Primary Connection String”, this string we will need in the next step to provision our device.
Installing the Azure IoT Edge Runtime
Execute the commands below in order, an up to date version can always be found here.
git clone https://github.com/pxcbe/azure-iot-edge.git
cd azure-iot-edge/install
sudo passwd root
su
chmod +x SetupEdge.sh
./SetupEdge.sh
The next step is provisioning our device. It is possible to do this semi or even fully automated. You can find more information about that here on the infoportal. Type the next command in your shell and paste your connection string on line 55 of the yaml file.(close with ctrl +s ctrl +x)
nano /etc/iotedge/config.yaml
Reboot the controller for the changes to have effect.
reboot
Verifying the install
Run the next command as root:
iotedge check --verbose If you get no errors we can proceed! You got an error? Check out the GitHub repository, maybe there is a fix available. Otherwise be free to create an issue!
Deploying Modules
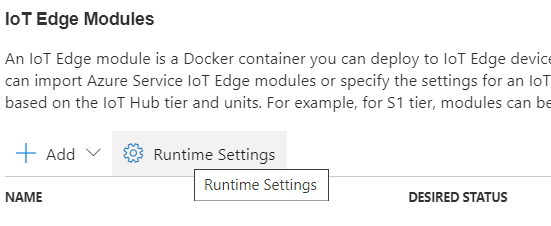
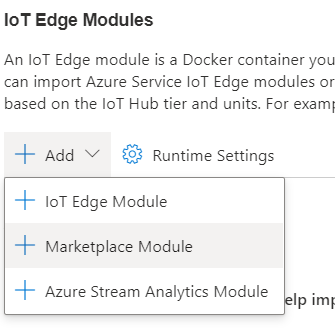
Only the runtime won’t do us any good. Let’s start deploying some modules! Click on “Set modules” and click on runtime settings. Here we need to change the “Hostport” in order to clear from the NGINX server running on the PLCnext. Finally add a market place module named “Simulated Temperature Sensor”. Press “review + create” and deploy the module to the PLCnext device.

The settings should look like this:
{
 "HostConfig": {
 "PortBindings": {
 "443/tcp": [
 {
 "HostPort": "444"
 }
 ],
 "5671/tcp": [
 {
 "HostPort": "5671"
 }
 ],
 "8883/tcp": [
 {
 "HostPort": "8883"
 }
 ]
 }
 }
}
Watching Telemetry messages
To verify if the messages are coming in. Please follow this procedure to install Azure IoT Tools in Visual Studio Code. (You’ll need to sign in to Azure, so make sure that if you are using certificates they are on your developing machine as well).
Getting PLCnext data to IoT Hub
The next step would be to bring our PLCnext Engineer data to the cloud. There are several ways to do this. You could use the Modbus module and create a Modbus server in your PLCnext project. You can use the REST service and GET requests with a custom module, our find one that suits your needs on the Marketplace. I’ll explain how to set up the OPC Publisher to get you started with publishing your data from the embedded OPC UA Server of the PLCnext.
UPDATE: IT looks like there is currently and error with the OPC Publisher module, please try an other method for now.
Disclaimer: For this blog we will disable the PLCnext Security features, please don’t use this in production!
Disable the user authentication on the WBM of your PLCnext device before continuing.
Add the OPCPublisher from the Marketplace in the same manner as you did with the “Simulated Temperature sensor”. Click on the module and go to container create options. Copy paste the next settings in the window under container create options.
{
 "Hostname": "publisher",
 "Cmd": [
 "publisher",
 "--pf=/appdata/publishednodes.json",
 "--di=60",
 "--to",
 "--aa",
 "--si=10",
 "--ms=262144"
 ],
 "HostConfig": {
 "Binds": [
 "/iiotedge:/appdata"
 ],
 "PortBindings": {
 "62222/tcp": [
 {
 "HostPort": "62222"
 }
 ]
 },
 "ExtraHosts": [
 "localhost:127.0.0.1"
 ]
 }
}
Modify the next configuration to fit your node id’s, create the folder /appdata and create a file with the name “publishednodes.json” that contains your new configuration.
[
 {
 "EndpointUrl": "opc.tcp://192.168.10.10:4840",
 "UseSecurity": false,
 "OpcNodes": [
 {
 "Id": "ns=3;s=Counter",
 "OpcSamplingInterval": 2000,
 "OpcPublishingInterval": 5000
 },
 {
 "Id": "ns=3;s=Sinusoid",
 "OpcSamplingInterval": 2000,
 "OpcPublishingInterval": 5000
 }
 ]
 }
]
If everything went well you should see the data in your Azure IoT Tools for visual studio!
Still having issues?
You can use the next command to see what is going on.
iotedge logs -f "namemode"
Credits
Special thanks to Oliver Warneke for his work that I could build on and for taking the time to get me up to speed!
Contact
Running into problems, or do you want to know more? Please contact axsupport@phoenixcontact.be.
Leave a Reply
You must be logged in to post a comment.