

Over the past few months, the Catan C1 has evolved into an open system powered by the PLCnext Core operating system. Thanks to the openness of the PLCnext ecosystem, it is now very straightforward to deploy applications using container technologies like Podman.
In this blog post, I’ll share how I successfully installed Home Assistant as a rootless container on the Catan C1—and how you can do the same. Special thank to JCM for helping me.
🚀 Why This Matters
The flexibility of PLCnext allows you to run modern IT applications directly on your controller. Running Home Assistant opens up possibilities such as:
Smart building integration
Zigbee-based automation
Edge-level IoT orchestration
Local, privacy-friendly smart home control
📦 Step-by-Step Installation Guide
- Create Working Directories
First, create a folder structure for Home Assistant:
mkdir ~/hass mkdir ~/hass/config
- Create the Container Configuration File
Create a YAML file for your container setup:
nano ~/hass/compose.yaml
- Add the Home Assistant Configuration
Copy and paste the following content into your compose.yaml:
services:
  homeassistant:
    container_name: homeassistant
    image: "ghcr.io/home-assistant/home-assistant:stable"
    volumes:
      - ~/hass/config:/config
      - /etc/localtime:/etc/localtime:ro
      - /run/dbus:/run/dbus:ro
      - /dev/usb-devices:/dev/usb-devices
    devices:
      - /dev/ttymxc2:/dev/ttymxc2
      - /dev/ttymxc3:/dev/ttymxc3
    restart: unless-stopped
    network_mode: host
    userns_mode: keep-id
    user: 1002:1002
    environment:
      TZ: Europe/Berlin
Notes: The container runs rootless using user namespace mapping (keep-id) USB and serial devices are passed through for IoT integrations Host network mode ensures easy web access
- Start the Container
Run the following command to start Home Assistant:
podman compose -f ~/hass/compose.yaml up
The first startup may take a few minutes while the image is downloaded and initialized.
- Access Home Assistant
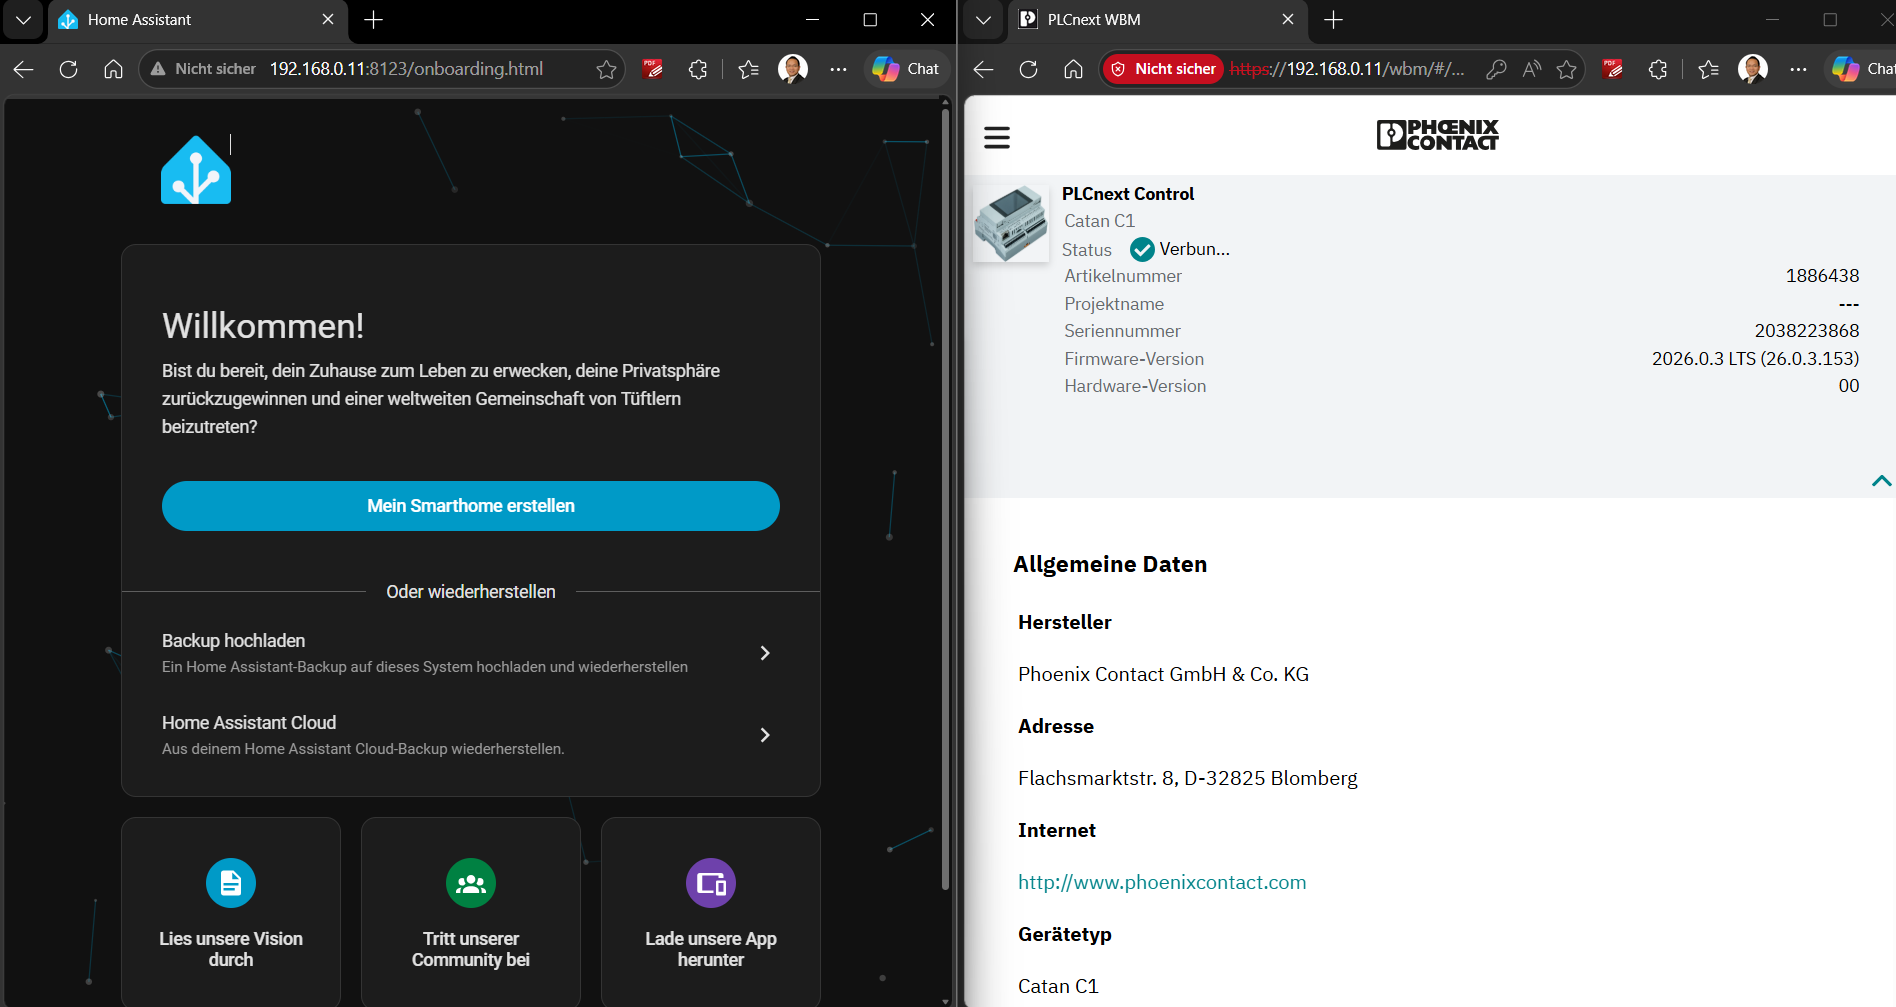
Once the container is running, you can access Home Assistant in your browser:
http://your.IP//:8123
🔌 Zigbee Stick Integration
- Verify USB Device Mapping
All USB devices are exposed under:
/dev/usb-devices
To identify your Zigbee stick, run:
ls -l /dev/usb-devices/symlinks/
Example output:
lrwxrwxrwx 1 app_user plcnext 16 Jun 12 11:07 usb-ITEAD_SONOFF_Zigbee_3.0_USB_Dongle_Plus_V2_20221129211414-if00 -> ../nodes/ttyACM0
👉 Important: The device name will differ depending on your hardware.
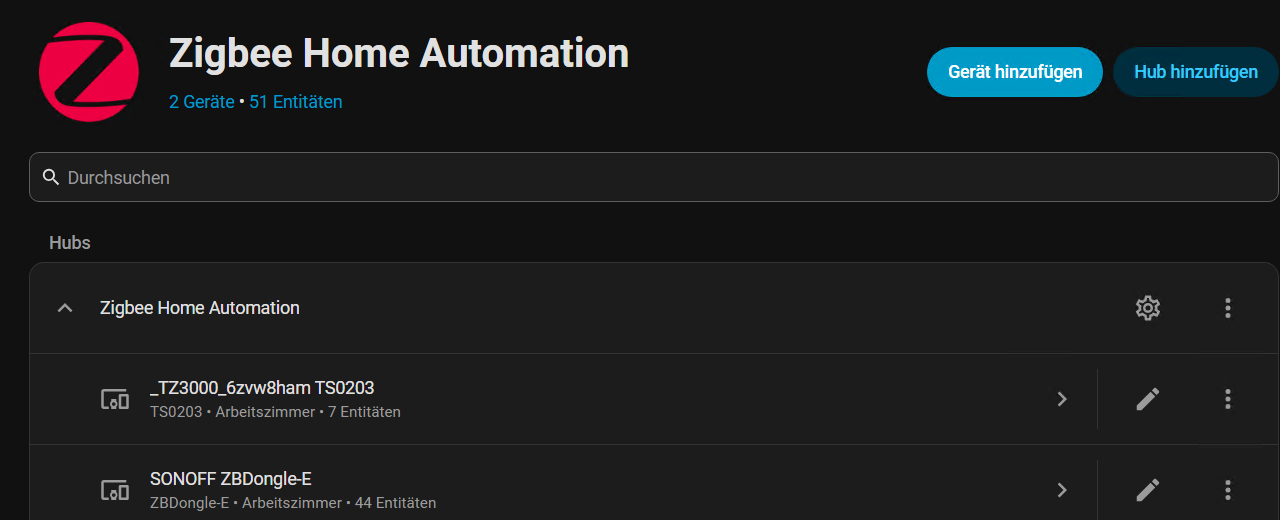
- Configure Zigbee in Home Assistant
After logging into Home Assistant:
Go to Settings → Devices & Services
Add a new Zigbee integration Use the correct device path, for example:
/dev/usb-devices/symlinks/usb-ITEAD_SONOFF_Zigbee_3.0_USB_Dongle_Plus_V2_20221129211414-if00
For the Sonoff Zigbee Dongle E, use:
EZSP driver
Software data flow
🏁 Final Result Once everything is configured:
Your Zigbee network can be initialized Devices can be paired and controlled Automation workflows can run locally on the Catan C1
💡 Conclusion With the openness of PLCnext Core and the simplicity of Podman containers, the Catan C1 becomes much more than a classical controller—it turns into a powerful edge IoT platform. Running Home Assistant rootless ensures:
Better security Clean user separation Easy deployment and maintenance
This approach is a great example of combining industrial control systems with modern IT ecosystems.
🔄 Update (June 15, 2026):
Modbus RTU Integration with EEM-MA250 As an additional update, I successfully connected my Catan C1 to an older EEM-MA250 energy meter (Order No. 2901363) using Modbus RTU.
For this setup, I used the integrated serial interface of the Catan C1.
🔌 Hardware Interface Details On the Catan C1, the serial interface is located:
Below the USB 1 port Labeled as:
C2+ (Connection point 6) C2- (Connection point 7)
This interface is mapped in the system to: /dev/ttymxc2
⚙️ Home Assistant Configuration To integrate the energy meter into Home Assistant, add the following configuration at the end of your: ~/hass/config/configuration.yaml
modbus:
  - name: "power_meter_serial"
    type: serial
    port: /dev/ttymxc2   # Adjust if your interface differs
    baudrate: 9600       # Verify with your device manual
    bytesize: 8
    method: rtu
    parity: N
    stopbits: 1

    sensors:
      - name: "Operating Hours"
        unique_id: power_meter_operating_hours
        slave: 6
        address: 50512
        input_type: holding
        data_type: uint32
        scale: 0.01
        unit_of_measurement: "h"
        scan_interval: 60

      - name: "Line Voltage U12"
        unique_id: power_meter_u12
        slave: 6
        address: 50514
        input_type: holding
        data_type: uint32
        scale: 0.01
        unit_of_measurement: "V"
        scan_interval: 10
        device_class: voltage
✅ Final Step After adding the configuration, restart Home Assistant. Once the system is back online, you should see live data from the energy meter directly in Home Assistant.
💡 Notes & Tips
The Modbus settings (baud rate, parity, etc.) must match your device configuration Register addresses may differ depending on your meter model The scaling factor (scale: 0.01) is required because values are provided in hundredths (e.g., V/100 or h/100)
With this setup, your Catan C1 becomes not only a smart home hub but also a powerful energy monitoring edge device, combining industrial data acquisition with modern IoT visualization.

Leave a Reply
You must be logged in to post a comment.