

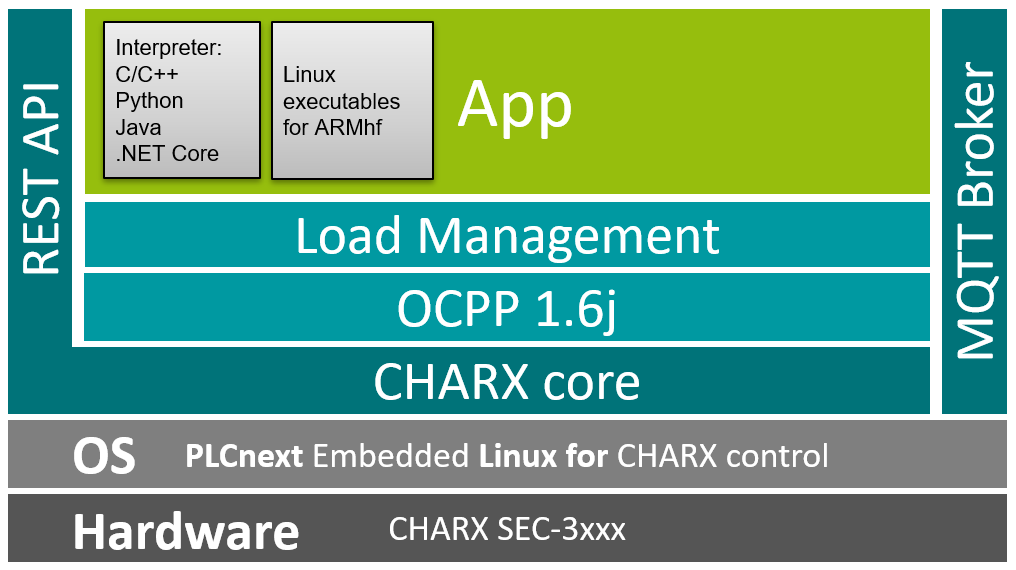
CHARX Control is built on the PLCNext Linux platform, similar to a PLCNext Controller. It features hardware specifications including an ARM Cortex-A7 processor, 512MB RAM, and 8GB flash storage (with 5GB of free space). The example provided is specifically based on a CHARX Control SEC-3050, but the principles can be adapted for a PLCNext Controller with an ARM Cortex-A9.
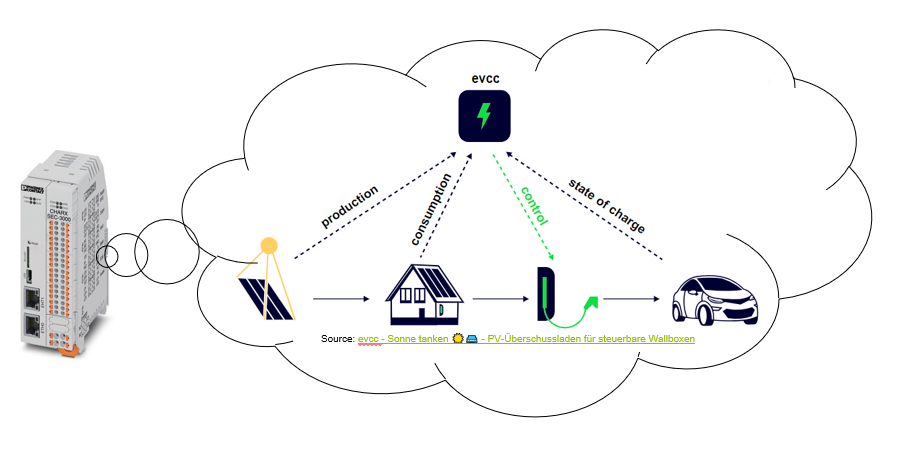
What sets evcc apart is its unique capabilities. It allows you to charge your electric vehicle using your own surplus PV power, making it a sustainable and cost-effective solution. By leveraging existing systems such as PV and battery inverters, wallboxes, and energy meters, evcc seamlessly integrates with your infrastructure. Its intuitive and user-friendly interface provides a straightforward experience, ensuring effortless control over your electric vehicle charging. Furthermore, evcc is 100% open source, fostering collaboration and customization possibilities.
Getting Started with evcc.io on CHARX SEC3xxx
This guide will walk you through the installation process of the evcc.io application on the CHARX SEC3xxx charging controller.
Prerequisites
Before you begin, please ensure you have the following:
- CHARX SEC3xxx charging controller
- Access to the terminal program
- SSH credentials (provided by default)
- Latest firmware installed
Installation Steps
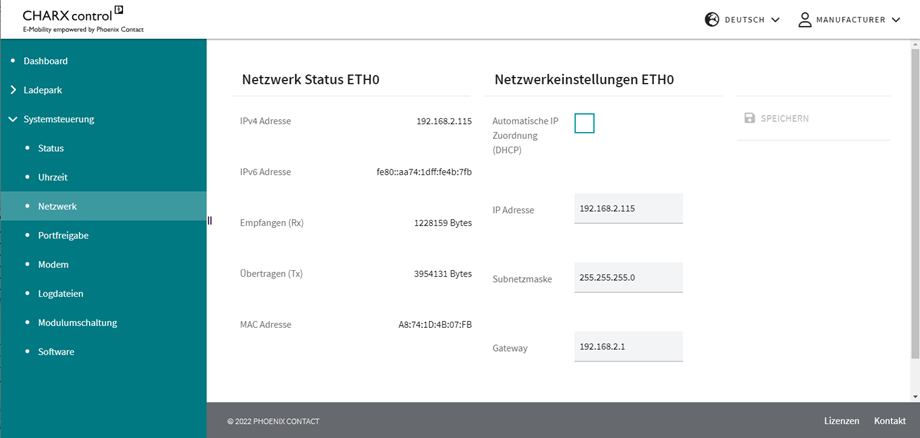
Network Configuration
- Assign a static IP address to the CHARX SEC3xxx controller.
- Configure the gateway settings accordingly.
- Check the manufacturer's manual https://www.phoenixcontact.com/de-de/produkte/ac-ladesteuerung-charx-sec-3000-1139022 for details on directory structure, filesystem access, and software installation.
- Verify and update the firmware to the latest version if needed.
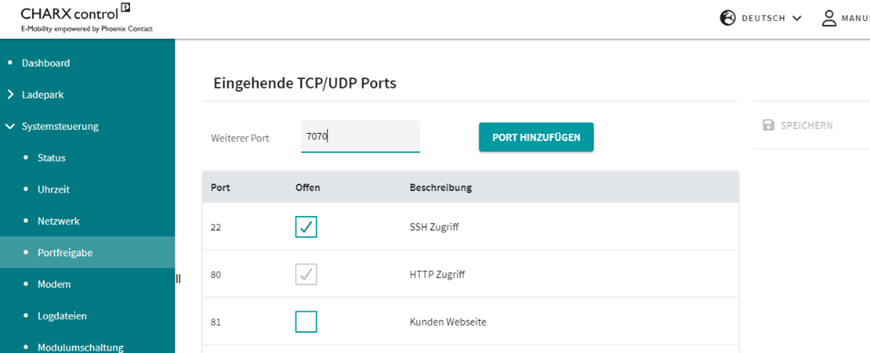
Port Forwarding
-
Open the CHARX controller configuration website.
-
Log in with the following credentials: | Username | Password | | -------- | -------- | | manufacturer | manufacturer |
-
Navigate to "System Control" and add an incoming port (e.g., 7070).
SSH connection to CHARX Control
- Open your terminal program and establish an SSH connection to the CHARX SEC3xxx controller using the following command:
ssh user-app@ev3000
- Authenticate using the provided SSH credentials. The default credentials are:
| Username | Password | | -------- | -------- | | user-app | user |
Make sure to change the password upon the first login.
Data Transfer
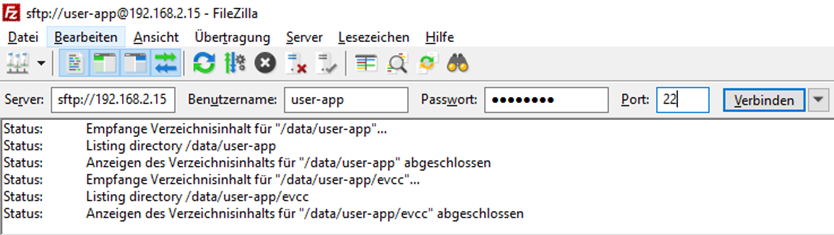
- Establish a connection to the CHARX SEC3xxx using an FTP program like WinScp or FileZilla.
- Use the IP address of the charging controller as the server address (e.g., 192.168.2.15).
- Enter the username "user-app" and the changed password.
- Use port 22 for the connection.
- Download the latest release binary file "evcc_x.xxx.x_armhf.deb" from the official GitHub repository: https://github.com/evcc-io/evcc/releases.
- Extract the downloaded file "evcc_x.xxx.x_armhf.deb" and then extract "data.tar".
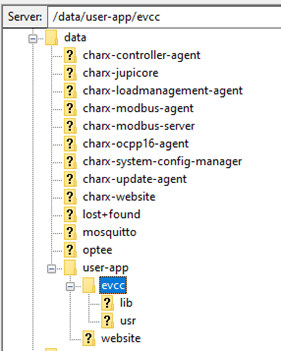
- Transfer the "usr" and "lib" directories to the "/data/user-app/evcc/" directory on the CHARX controller to ensure the files are not deleted during software updates.
Linux Application Permissions
- Open a terminal window.
- Change to the "/data/user-app/evcc/usr/bin" directory using the command:
cd /data/user-app/evcc/usr/bin
- Grant execution permissions to the "evcc" application by running the command:
chmod +x evcc
- Add the directory to the environment variables using the command:
export PATH=$PATH:/data/user-app/evcc/usr/bin
Initial Application Test
- Run the command:
./evcc
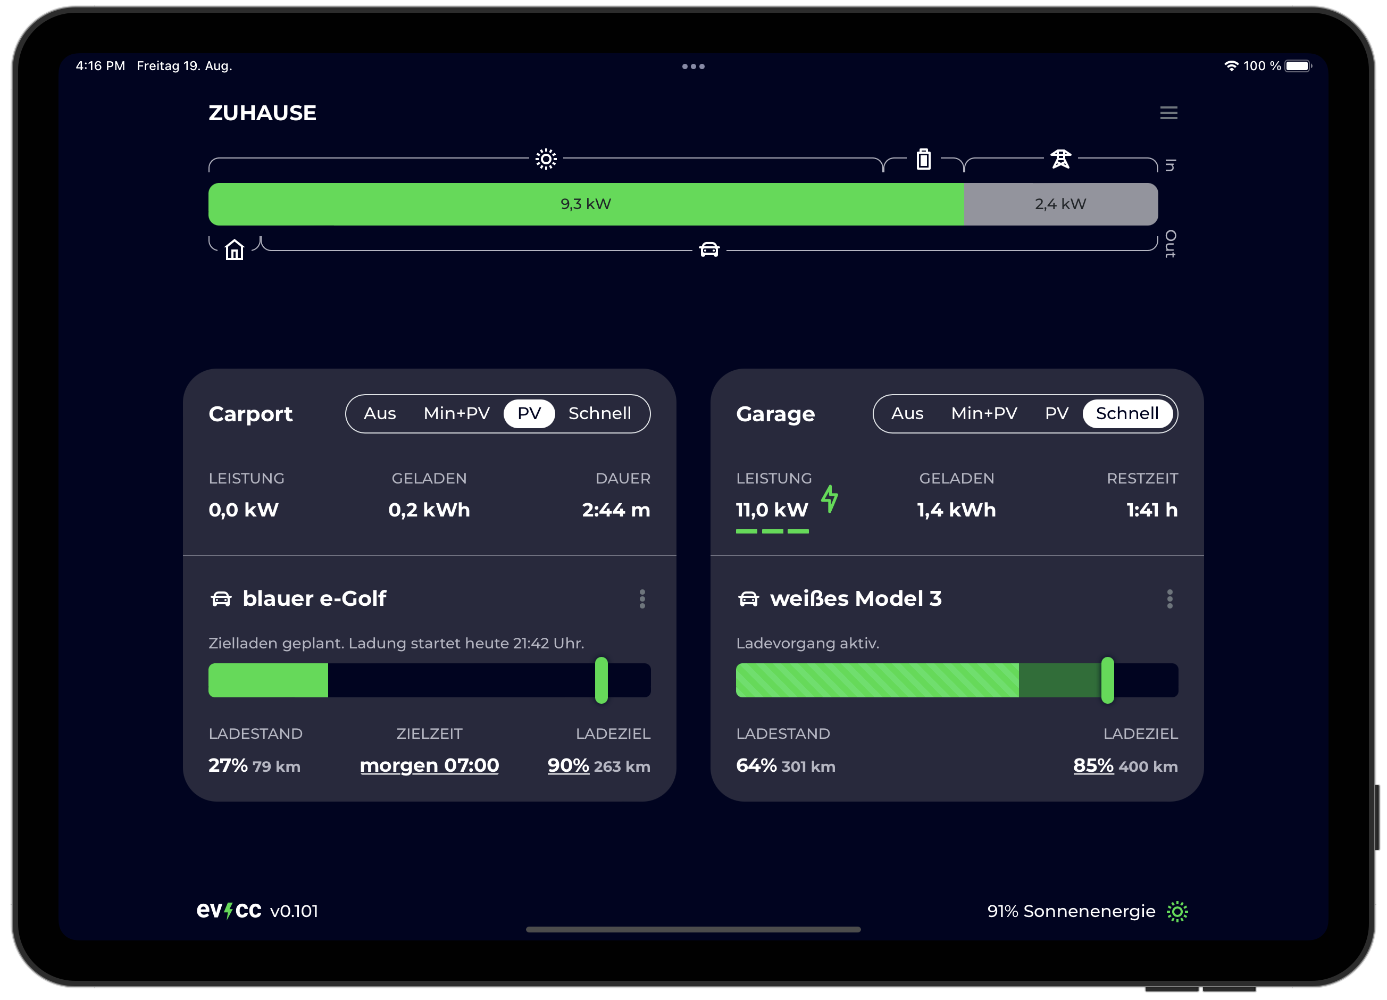
This will start the evcc.io application.
- Test the evcc.io interface by opening a web browser and entering the CHARX SEC3xxx IP address with the port 7070 (e.g., http://192.168.2.15:7070 or evcc.local:7070).
Configuration
- Start the configuration process by running the command:
./evcc configure
Follow the instructions provided in the terminal window. Note: Advanced More Information to Configuration evcc.io :https://docs.evcc.io/docs/guides/setup
Set Autostart
- Open a terminal window.
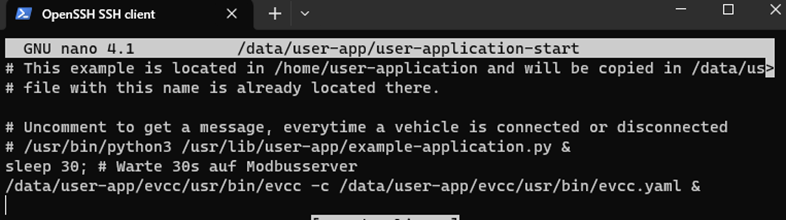
- Use NANO to edit “user-application-start" in directory "/data/user-app" using the command:
nano /data/user-app/user-application-start
- Add the following lines:
sleep 30; # wait 30s for Modbusservice
/data/user-app/evcc/usr/bin/evcc -c /data/user-app/evcc/usr/bin/evcc.yaml  &
- Exit with Ctrl + x and save.
After a restart, the applicationshould start again automatically.
sudo reboot
Leave a Reply
You must be logged in to post a comment.